Roof Skylight Replacement Guide: Costs & Contractors
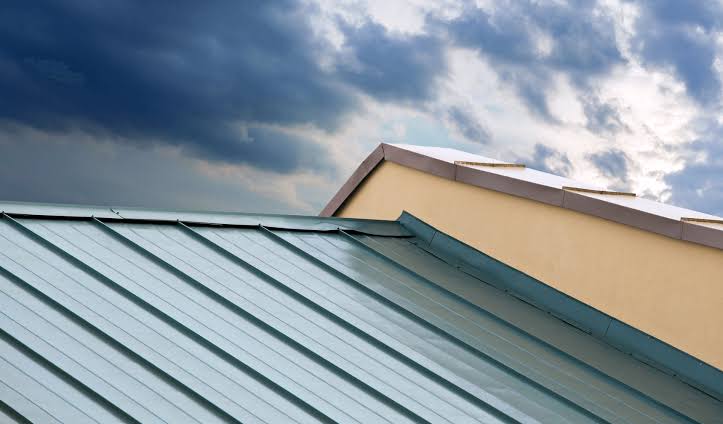
Integrating skylights into a residential or commercial roofing system is a highly effective method for maximizing natural daylight, enhancing thermal efficiency, and improving indoor ventilation. However, because a skylight breaks the continuous plane of a roof’s waterproofing membrane, it represents a complex structural intersection. Over time, environmental exposure, ultraviolet radiation, and thermal expansion take a toll on these fixtures. When rubber seals dry-rot, acrylic domes cloud over, or step flashings fail, a timely replacement is required to protect the building’s interior from severe water damage.
Replacing a roof window involves overlapping technical skills, combining fine interior finish carpentry, advanced structural framing, and specialized exterior roof flashing. This educational guide breaks down the physical construction steps, product classifications, labor costs, and long-term asset management protocols involved in skylight replacement. Readers will establish an objective framework to accurately evaluate their current installations, project realistic project budgets, manage installation risks, and successfully coordinate with qualified local trade professionals.
Overview of Roof Skylight Replacement
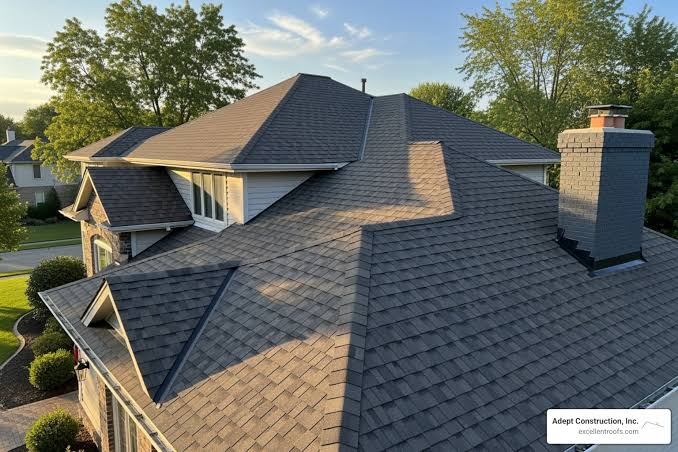
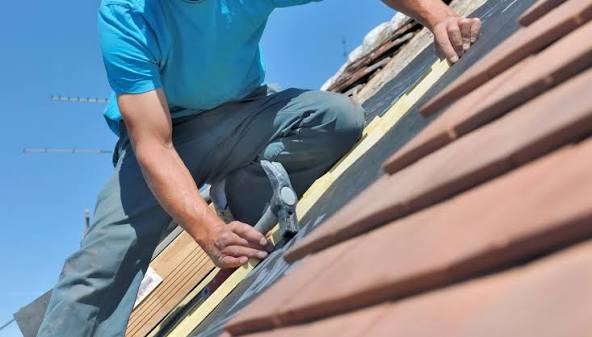
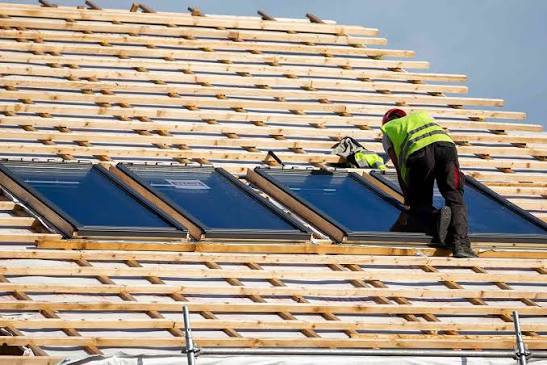
When property owners encounter internal wall stains or condensation buildup between window panes, searching for a roof skylight replacement contractors near me represents the first step in a precise multi-staged building remediation. In structural terms, a skylight installation sits at the crossroads of two separate engineering grids: the interior drywall light shaft and the exterior weather-shedding surface layer. The replacement process requires removing the existing glass assembly down to the structural roof curb, evaluating the underlying header framing for wood rot, wrapping the curb in self-healing underlayment, and interlocking new step flashings with the surrounding shingles.
The core purpose of deploying a systematic replacement framework is to align modern fenestration metrics with current building safety and energy codes. Standard older skylights often utilize monolithic glass or thin acrylic domes that allow heavy summer heat gain and winter heat loss, which drives up HVAC energy bills. Modern replacement assemblies utilize double or triple-pane insulated glass filled with argon gas, protected by low-emissivity (Low-E) metallic coatings. A properly executed architectural upgrade blocks moisture intrusion completely, matches regional wind and snow load tolerances, resists glass shattering from wind-blown debris, and maintains structural seals across decades of seasonal temperature shifts.
Core Equipment Categories and Mechanical Typologies
Skylight replacement units are grouped into distinct families based on their structural framing, attachment geometry, and mechanical ventilation capabilities.
Structural Framework and Skylight Classifications
| Category / Type | Description | Common Use Case | Time / Cost / Effort Level |
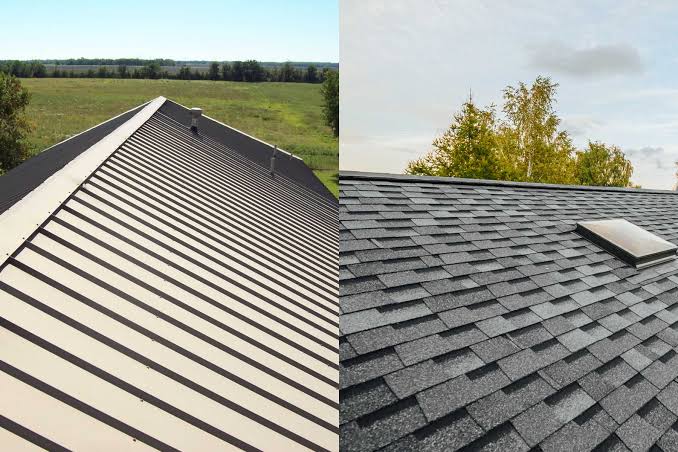
| Deck-Mounted Insulated Glass | A low-profile unit containing an integrated insulated frame that screws directly onto the flat plywood roof deck. | Modern residential steep-slope roofs seeking maximum energy efficiency and clean exterior lines. | Low installation time; Moderate cost; Moderate physical effort. |
| Curb-Mounted Modular Units | A window box configuration designed to cap over a raised wood frame (curb) built out from the roof surface. | Low-slope or flat roof systems, historic homes, or regions prone to heavy, standing winter snow accumulation. | Medium installation time; Moderate cost; Moderate effort. |
| Manual / Electric Venting Units | Operable skylights featuring built-in gas struts or chain-drive motors that open the glass pane to vent hot indoor air. | Kitchens, upper-story bathrooms, or multi-level lofts requiring moisture extraction and passive cooling cycles. | High installation time; High material cost; High precision effort. |
| Tubular Daylight Devices (Solar Tubes) | A small dome captured on the roof that routes natural light down a highly reflective aluminum cylinder to an interior ceiling lens. | Interior hallways, windowless bathrooms, or tight walk-in closets where structural framing constraints prevent standard large skylights. | Low execution time; Low material cost; Minimal physical effort. |
Selecting the ideal equipment setup depends heavily on the existing structural roof framing and the slope of the property. Deck-mounted options offer excellent airtightness and a low silhouette, making them standard for asphalt shingle roofs with a distinct incline. However, for low-slope or completely flat roofs where water drains slowly, building a raised wood curb and utilizing a curb-mounted skylight is mandatory. This raised design keeps the critical glass-to-frame joint lines safely elevated 6 to 8 inches above standing water and winter ice accumulation.
Practical Construction Scenarios and Spatial Applications
To clarify how these engineering and fenestration choices perform in the field, analyze three common installation applications.
Scenario 1: The Kitchen Deck-Mounted Venting Retrofit
An upgrade executed to replace an old, cloudy, fixed acrylic dome window situated directly over a high-moisture residential cooking area.
-
Key Steps: 1. Strip the surrounding asphalt shingle boundary down to the raw plywood decking layer. 2. Lift out the degraded acrylic frame assembly and check the light shaft headers for wood rot. 3. Screw down an energy-efficient, solar-powered electric venting deck-mounted skylight. 4. Run self-healing rubberized membranes up the frame edges and weave fresh aluminum step flashings with new shingles.
-
Relevance: This layout targets the specific problem of trapped interior moisture and high solar heat gain, utilizing motorized venting glass to pull hot cooking vapor out of the home naturally.
Scenario 2: The Low-Slope Urban Curb Rebuild
A large-scale commercial or residential flat-roof window replacement on a building situated in a northern region prone to heavy snow loading and freeze-thaw cycles.
-
Key Steps:
-
Carefully strip back the surrounding modified bitumen or EPDM rubber membrane layers.
-
Demolish the original rotted wood curb framework down to the structural ceiling trusses.
-
Build a reinforced, 8-inch high exterior wood curb out of pressure-treated 2×8 dimensional lumber.
-
Cap the new wood frame with a heavy-duty, impact-resistant curb-mounted insulated glass skylight.
-
-
Relevance: This application addresses sub-surface structural failures, showing how raising the window framework on a newly engineered wood curb prevents leaks caused by winter snow melting along flat roofs.
Scenario 3: The Interior Hallway Tubular Integration
An installation executed on an architectural footprint where a standard large skylight would require cutting through critical structural roof trusses or disrupting ceiling layouts.
-
Key Steps:
-
Cut a small, circular 14-inch hole through the exterior shingle layer and plywood deck.
-
Route a highly reflective, rigid sheet-metal optical cylinder through the open attic cavity.
-
Secure a clear polycarbonate high-impact weather dome to the roof surface using a molded flashing boot.
-
Mount a prismatic light diffuser plate to the interior hallway ceiling drywall.
-
-
Relevance: This scenario highlights flexible spatial design, demonstrating how to bring abundant natural light into deep, isolated interior rooms without incurring the high labor costs of altering roof trusses.
Comparative Evaluation
Scenario 1 leverages modular deck-mounted shapes and solar venting electronics to improve ventilation over active living spaces at a balanced price point. Scenario 2 scales structural engineering significantly, requiring structural curb carpentry and heavy membrane flashing to handle slow-draining flat roofs. Scenario 3 bypasses structural modifications entirely, utilizing reflective optical tubes to route light down through tight attic spaces affordably.
Technical Planning, Foundations, and Resource Cost Matrices
Developing a precise budget framework for a structural skylight upgrade requires separating the raw window equipment costs from essential subsurface framing repairs, structural flashing kits, and specialized labor. When projecting expenditures with a roof skylight replacement contractors near me framework, building owners must evaluate structural variables like drywall repairs, mechanical electrical routing, and window pane styles.
Sample Project Budget Framework (Standard 2×4 Foot Skylight Baseline)
| Project Category | Fixed Insulated Deck-Mount | Electric Venting Curb-Mount | Optical Tubular Device | Optimization Tips |
| Raw Window Equipment Cost | $400 – $850 | $900 – $1,800 | $250 – $550 | Standardizing on common manufacturer sizes avoids custom factory glass-casting fees and long delivery delays. |
| Engineered Flashing & Membrane Kits | $80 – $180 | $120 – $250 | $50 – $100 | Always purchase the window manufacturer’s matching flashing kit to unlock full multi-decade system leak warranties. |
| Site Prep & Substrate Remediation | $200 – $500 | $400 – $900 | $100 – $300 | Tearing off shingles a full 2 feet around the frame gives you the clear space needed to lay a reliable waterproof shield. |
| Interior Drywall & Shaft Painting | $0 – $600 | $0 – $600 | $0 – $200 | Replacing a window with the exact same dimensions eliminates the need for messy, expensive interior drywall alterations. |
| Specialized Technical Trade Labor | $400 – $1,000 | $600 – $1,500 | $300 – $700 | Hire contractors carrying distinct master-installer certifications from major brands to secure extended labor warranties. |
| Total Estimated Installed Cost | $1,080 – $3,130 | $2,020 – $5,050 | $700 – $1,850 | While premium upgrades require a higher initial out-of-pocket budget, they protect internal spaces from secondary water damage. |
Note: The cost framework parameters and resource distributions outlined above serve as illustrative examples based on standard national material indices. Final field quotes will fluctuate according to localized labor structures, roof pitch changes, structural frame remediation demands, and regional cost of living variations.
Contractor Evaluation and Project Management Channels
Property owners can execute the procurement and assembly phase through several distinct project management channels, depending on their technical experience and budget parameters.
1. Factory-Certified Tier 1 Skylight Specialists
Engaging a professional fenestration or roofing firm carrying elite manufacturer certifications (such as Velux 5-Star Certified Installers).
-
Advantages: Authorized to provision extended manufacturer system warranties covering both material defects and contractor installation labor for 10 to 20 years; possess specialized training in flashing details.
-
Disadvantages: Commands premium labor rates and general contractor management markup overhead.
2. General Residential Roofing Contractors
Hiring a broad-scope regional roofing company whose daily output centers on high-volume asphalt shingle replacement, modular repairs, and general home weatherization.
-
Advantages: Highly efficient at managing the exterior roof tie-in; can easily combine skylight replacement with a full roof replacement schedule to control logistics costs.
-
Disadvantages: May lack internal specialization in fine interior finish carpentry or diagnostic electrical troubleshooting for motorized venting units.
3. Phased Material Sourcing and Management (Independent DIY Coordination)
The property owner manages the project independently by ordering structural window units from a supply house, stripping the shingles themselves, and hiring an independent carpenter for hourly assembly.
-
Advantages: Eliminates middle-tier general contractor markups, providing the lowest direct capital investment.
-
Disadvantages: The homeowner assumes complete financial risk for construction flaws, code violations, and unexpected structural leaks if the flashing fails during a storm.
Mitigating Building Risks, Code Enforcement, and Water Failures
Roof skylights operate under severe weather exposure. Failing to follow strict material guidelines and corporate installation rules will quickly result in framing rot, window fogging, or catastrophic water leaks.
-
Omitting the Continuous Rubberized Ice & Water Shield Wrap: Relying solely on standard metal flashings and step tins without a base waterproof membrane is a critical error. Wind-driven rain or water backed up by melting winter ice will seep underneath the metal trim. Without a secondary barrier, this water will soak the wood curb and rot the underlying structural ceiling headers. Prevention: Ensure a continuous layer of self-healing, rubberized asphalt underlayment is wrapped up the exterior walls of the wood curb and extended a minimum of 12 inches out onto the flat roof deck before installing any metal flashing panels.
-
Improper Fastener Placement and Pitch Transitions: Driving screws or roofing nails directly through the horizontal water-shedding paths of the flashing pan creates direct entry points for water. Over a few seasons, the expanding metal will wallow out the holes, allowing rainwater to leak down the screw threads directly into the building’s interior framing. Prevention: Fasten all flashings into the vertical walls of the skylight frame or wood curb rather than drilling down into the horizontal roof deck, and follow the strict vertical stacking rules for step tins.
-
Condensation Tracking vs. True Insulated Glass Seal Failure: Homeowners frequently assume a skylight is leaking when they notice moisture tracking down the interior drywall light shaft. However, in rooms like bathrooms and kitchens, high indoor humidity will naturally condense on cold, single-pane glass during winter, running down the wall like a leak. Prevention: Distinguish between surface condensation and a true insulated glass unit (IGU) seal failure. A seal failure shows up as permanent, un-wipeable fogging or mineral stains trapped inside the hollow space between the double glass panes, indicating the window must be replaced.
Preventative Maintenance and Asset Management Protocols
While modern architectural glass fixtures eliminate the constant cracking common to old acrylic domes, keeping a structural skylight stable requires a consistent preventative care routine.
-
Bi-Annual Roof System Maintenance Checklist:
-
Clean out accumulated leaves, pine needles, and twigs from the upper horizontal flashing pan to ensure heavy rainwater drains freely around the window frame.
-
Inspect the exterior rubber gaskets and silicone seals holding the glass pane into the aluminum frame shroud, checking for any cracks or dry rot.
-
Check the interior light shaft drywall corners after heavy rain cells to catch any micro-leaks or water staining before they rot the wood headers.
-
-
Environmental Preservation Guidelines:
-
Trim back overhanging tree branches a minimum of 6 to 10 feet away from the skylight glass. This prevents branches from scratching protective frame coatings during high winds and stops tree sap and organic debris from trapping moisture on the glass surface.
-
Quality Verification and Structural Hand-off Project Records
Maintaining an organized archive of your installation documents ensures subsequent home property appraisals, local zoning audits, or insurance adjustments proceed smoothly without logistical delays.
Systematizing Construction Records
Property owners should compile an organized physical or digital file ledger containing signed municipal permits, official manufacturer system warranty registration certificates, aggregate material delivery tickets, and clear photographs of the sub-surface deck preparation.
Illustrative Residential Property Profiles
-
Example A: A homeowner files an official corporate extended warranty certificate proving that both their materials and labor are fully backed by a multi-billion-dollar manufacturer for the next 10 years. This document provides immense peace of mind and adds authenticated value when marketing the home to prospective buyers.
-
Example B: During a home appraisal for a property sale, the owner presents proof of an upgraded Energy Star certified triple-pane glass skylight installation, successfully securing a higher structural asset valuation from the bank appraiser.
-
Example C: A contractor records date-stamped photographs of the internal structural deck flashing and self-healing ice and water shield membranes before the final surface layers are fastened down, providing permanent proof of building code compliance.
Closing Summary
Successfully planning and executing a structural outdoor transformation using a roof skylight replacement contractors near me framework depends on balancing proper subsurface preparation with quality material selection. While modern insulated glass windows require careful planning and a precise installation process, they provide a durable, energy-efficient alternative that eliminates the heavy leaks and heat loss common to old acrylic fixtures. By ensuring a proper rubberized underlayment wrap, maintaining clean flashing paths, and keeping up with basic cleaning care, homeowners can secure a premium natural lighting system that functions reliably across every season.
Frequently Asked Questions (FAQ)
What is the exact difference between a deck-mounted and a curb-mounted skylight?
A deck-mounted skylight features a built-in insulated frame that fastens directly to the flat plywood roof deck, offering a low profile and excellent energy efficiency standard for residential homes. A curb-mounted skylight requires building a raised wood frame (curb) out from the roof first; the skylight then caps over this box like a shoebox lid, making it highly effective for flat roofs or areas with heavy winter snow accumulation.
Can a single cracked pane of glass in a double-pane skylight be replaced independently?
While replacing just the glass insert pane is physically possible, it is rarely recommended for aged outdoor skylights. The labor cost to scrape away old industrial factory seals and set a new glass block on a roof slope often equals the price of a full factory-assembled replacement unit, and field-sealed glass units lack the long-term warranty protection of a complete replacement system.
How do modern low-emissivity (Low-E) glass coatings help control interior home climates?
Low-E coatings are microscopically thin, non-toxic metallic layers applied directly to the internal surfaces of the glass panes. These structures reflect invisible infrared and ultraviolet light rays away from the home during summer to cut down on solar heat gain, while trapping warm interior radiant heat inside the building envelope during winter, significantly lowering household utility costs.