Emergency Roof Tarping Guide: Temporary Repair & Costs
When a severe weather event, fallen tree, or sudden structural failure compromises a residential or commercial roof, the immediate priority shifts from long-term renovation to rapid damage containment. An exposed roof allows rainwater to penetrate the building envelope, quickly destroying drywall, compromising electrical systems, weakening structural framing, and encouraging mold growth. Temporary roof mitigation—primarily achieved through professional structural tarping—serves as the critical first line of defense to stabilize the asset before permanent repairs can be legally permitted and executed.
Navigating the logistics, safety protocols, and financial frameworks of rapid home mitigation requires an understanding of both physical construction standards and insurance requirements. This educational guide breaks down the methods used in professional emergency tarping, temporary material lifespans, cost considerations, and hazard mitigation steps. Readers will establish an authoritative framework to accurately evaluate site damage, coordinate effectively with temporary service providers, and protect their property from secondary environmental degradation.
Overview of Emergency Roof Tarping Systems
When property owners face sudden breach conditions and look for an emergency tarp roof repair service near me, the primary technical objective is to establish a secure, temporary shedding plane over the compromised decking. Emergency roof tarping is a highly specialized mitigation tactic designed to span missing shingles, exposed rafters, or structural punctures. It is not an active patch or permanent repair; rather, it is a defensive canopy system mechanically anchored to resist wind uplift forces and shed precipitation away from the interior framing.
The primary goal of engaging a rapid-response technician is to achieve immediate stabilization that satisfies the property owner’s legal obligation to mitigate losses. Standard homeowner insurance policies strictly mandate that the policyholder take immediate, reasonable steps to prevent secondary water damage following an insurable event. A properly secured temporary roof system protects the structure’s interior spaces, allows residents or commercial operations to remain safely on-site when legally permitted, and provides a stable window of time to acquire permanent roofing estimates and architectural blueprints.
Material Typologies and Tarping Structural Classifications
Temporary roof protection arrays are categorized by their material composition, structural thickness, and the physical anchoring hardware utilized to resist localized wind shear.
Temporary Mitigation Material Profiles
| Category / Type | Description | Common Use Case | Time / Cost / Effort Level |
| Standard Woven Polyethylene Tarp | Lightweight, high-density polyethylene strands laminated with a waterproof coating, secured via wood furring strips. | Rapid mitigation for minor shingle loss or localized puncture holes after a storm. | Low execution time; Low material cost; Moderate physical effort. |
| Heavy-Duty PVC/Vinyl Tarps | Industrial-grade polyvinyl chloride coatings reinforced with polyester scrim, providing high tear resistance. | Extended structural exposure or commercial flat roofs facing prolonged construction delays. | Medium execution time; Moderate material cost; High physical effort. |
| Shrink-Wrap Roof Membranes | Thick polymer film rolled across the roof and heated with a specialized propane torch to form a tight seal. | Complex roof geometries, historical structures, or high-wind zones where furring strips are impractical. | Medium execution time; High material cost; Maximum precision effort. |
| Self-Adhering Underlayment (Ice & Water Shield) | A thick rubberized asphalt membrane with a peel-and-stick backing applied directly to raw plywood. | Minor wind damage where the surrounding asphalt shingles remain completely stable and flat. | Low execution time; Low to Moderate cost; Minimal physical effort. |
Selecting the ideal protection method depends heavily on the extent of the structural damage, the slope of the roof, and the anticipated waiting period before permanent construction begins. Properties in active hurricane recovery zones, where permanent roofing labor face backlogs of multiple months, typically require the heavy-duty tear resistance of vinyl systems or the airtight seal of hot shrink-wrap membranes. Conversely, standard suburban homes suffering minor tree limb punctures can be effectively protected using standard woven poly sheets mechanically anchored with structural lumber battens.
Practical Mitigation Scenarios and Weather Applications
To contextualize how these temporary engineering systems behave under real-world emergency pressures, analyze three distinct installation applications.
Scenario 1: The Post-Storm High-Wind Shingle Breach
An installation executed immediately after a severe convective storm removes multiple sections of asphalt shingles from an exposed, unshaded gabled roof.
-
Key Components: A 10-by-20-foot high-density blue poly tarp spanning the roof ridge line, secured using 1×2-inch wood furring strips driven through the shingle layer into the roof trusses using exterior-rated structural screws.
-
Relevance: This layout uses the structural ridge line to naturally deflect moving air over the top of the tarp, preventing wind from catching the upper edge and ripping the temporary sheet away from the roof deck.
Scenario 2: The Fallen Tree Structural Rafter Puncture
A complex emergency scenario where a heavy tree limb punctures the roof decking, fracturing structural rafters and leaving a wide gap exposed directly to incoming rain.
-
Key Components: Custom structural framing built over the hole to prevent tarp sagging, heavy-duty 18-ounce industrial vinyl tarps, thick rubberized membrane wraps around the base of fractured chimneys or valleys, and sandbag perimeter weights combined with mechanical furring strips.
-
Relevance: This scenario highlights the necessity of building an underlying temporary frame to support the weight of accumulating rainwater, preventing the tarp from collapsing inward and creating a low point that collects water.
Scenario 3: The Urban Low-Slope Commercial Terrace Failure
An emergency intervention on an unpitched or low-slope commercial roof system where standing water has breached the primary modified bitumen membrane layer.
-
Key Components: Specialized non-penetrating weighted tarp systems or continuous heavy-duty self-adhering membranes rolled directly across clean, dry substrate edges, combined with targeted clear drainage exit lines.
-
Relevance: Standard mechanical wood furring strips cannot be screwed directly into a flat roof membrane without creating thousands of new leak paths. This layout demands specialized ballast or adhesive-based anchoring methods to secure the barrier safely.
Comparative Evaluation
Scenario 1 relies on aerodynamic ridge-spanning and simple wood battens to achieve rapid wind and water deflection at an entry-level cost structure. Scenario 2 scales structural engineering significantly, requiring carpentry framing before the membrane is laid to bridge wide rafter voids. Scenario 3 moves entirely away from penetrating fasteners, utilizing weight ballast or high-bond chemical adhesives to preserve the underlying structure without causing extra damage.
Financial Frameworks and Emergency Resource Matrices
Developing an accurate budget baseline for emergency mitigation requires separating immediate, rapid-response dispatch fees from standard, scheduled construction costs. When property owners mobilize an emergency tarp roof repair service near me, the overarching budget must account for hazardous high-climb access, immediate mobilization labor, structural securing lumber, and detailed documentation for insurance reimbursement.
Sample Emergency Mitigation Budget Framework
| Category | Estimated Amount / Effort | Explanation | Optimization Tips |
| Emergency Dispatch & Assessment Fee | $150 – $450 | Immediate vehicle mobilization, rapid site safety evaluation, and structural hazard inspection during off-hours. | Request a flat-rate dispatch fee upfront to avoid open-ended hourly tracking during widespread regional storm events. |
| Core Mitigation Tarping Materials | $200 – $900 | High-density polyethylene or vinyl sheets, specialized structural screws, and pressure-treated wood furring battens. | Standardizing on thick, UV-stabilized tarps prevents having to pay for a second mitigation service if construction is delayed. |
| Hazard Structural Carpentry Labor | $400 – $1,800 | Labor for climbing steep pitches, cleaning away broken shingle debris, building support structures over holes, and securing lumber. | Ensure the crew uses structural screws rather than standard smooth nails; screws provide significantly higher wind pull-out resistance. |
| Specialized Equipment Rentals (Lift/Scaffold) | $300 – $1,200 | Sourcing specialized mechanical boom lifts or scaffolding rigs for multistory properties or steep, icy roofs. | If multiple neighboring properties suffer similar damage, coordinating a single machinery rental can lower individual costs. |
| Insurance Documentation & Progress Packaging | $100 – $350 | Providing comprehensive high-resolution digital imagery, geolocated damage mapping, and formal invoice summaries. | Demand that the mitigation crew provide clear “before” and “after” photos of the bare roof deck to streamline your claim. |
Note: The financial distributions and material allocations outlined above serve as illustrative structural examples based on national emergency construction averages. Final field quotes will fluctuate heavily based on localized labor strain, active storm disaster declarations, structure heights, wind speeds, and site safety conditions.
Technical Strategies, Tools, and Support Options
Property owners can execute the emergency containment phase through several distinct project management channels, depending on localized site challenges and personal technical capability.
1. Dedicated 24/7 Disaster Restoration Firms
Engaging a professional emergency restoration company whose crews focus primarily on rapid structural board-ups, water extraction, and immediate roof tarping.
-
Advantages: Maintain dedicated rapid-response dispatch loops; possess industrial safety harnesses and heavy truck lifts; provide detailed documentation pre-formatted for insurance adjusters.
-
Disadvantages: Commands premium emergency labor rates and general management markups.
2. General Local Roofing Contractors
Hiring a local standard roof construction company that offers secondary emergency repair and tarping services to their regional client base.
-
Advantages: Deep familiarity with local structural residential framing systems; can seamlessly transition from temporary tarping to permanent shingle replacement.
-
Disadvantages: Can be incredibly difficult to reach during major regional storm events when their primary installation crews are fully booked.
3. Immediate Owner-Builder Temporary Tarping (Advanced DIY)
The property owner independently procures heavy-duty poly tarps and 1×2 wood strips from a local home center and climbs the roof to execute the installation themselves.
-
Advantages: Eliminates middle-tier contractor dispatch wait times and management markup fees, providing the fastest direct site enclosure.
-
Disadvantages: Demands climbing high, slick surfaces without commercial-grade fall-arrest gear, carrying extreme physical fall risks and the potential to cause extra damage to surrounding shingles.
Safety Protocols, Height Risks, and Common Mistakes
Climbing a compromised roof structure during or immediately following a severe weather event presents exceptional physical hazards. Mitigating these risks requires strict adherence to industry-standard safety protocols.
-
Climbing a Damaged Roof Structure Alone Without a Fall-Arrest Matrix: Attempting to install a temporary tarp during high winds, active rain, or fading daylight without OSHA-compliant safety harnesses and roof anchors frequently results in catastrophic falls. Prevention: Never step onto a roof pitch alone or without a secure secondary lifeline anchored to a verified structural framing member or an opposing ground weight.
-
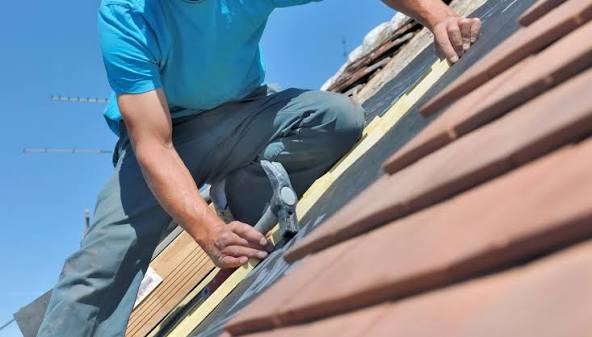
Securing Tarps Using Standard Brick, Cinderblock, or Loose Stone Weights: Homeowners often try to avoid screwing holes into their roof by throwing loose heavy objects onto a tarp to weigh it down. During a high-wind storm, wind will easily get underneath the tarp edges, turning it into a sail that flings the heavy bricks off the roof. This creates dangerous airborne debris that can crash through windows or injure anyone below. Prevention: Always secure the tarp perimeter mechanically using flat wood furring strips screwed tightly down into the roof deck every 12 to 24 inches.
-
Tarping Underneath the Upper Shingles (The Reverse-Lap Leak Failure): If an installer lays the top edge of a tarp over the top of the shingles above it, rainwater flowing down the roof will hit the edge of the plastic, flow straight underneath the tarp, and run directly into the damaged roof deck hole. Prevention: Always run the top edge of the tarp underneath the intact row of shingles situated above the damaged zone, or wrap the tarp entirely over the roof peak to establish a natural, overlapping water shedding plane.
Best Practices for Temporary Roof Management
While a professionally secured structural tarp protects a property from immediate rain intrusion, keeping it stable and functional requires a consistent inspection routine.
-
Temporary Pavement Monitoring Checklist:
-
Post-Storm Inspection: After every subsequent heavy rain or high-wind event, inspect the tarp layout from the ground using binoculars to check for shifting wood battens or tears in the plastic matrix.
-
Internal Moisture Audit: Check interior ceilings and attic spaces regularly for signs of dampness, water stains, or high ambient humidity, which indicate that water is bypassing the temporary shield.
-
Fastener Tracking: Verify that the anchor screws holding down the perimeter wood strips remain tight and have not backed out due to thermal shifts or wind vibrations.
-
-
Time Management Guidelines:
-
Treat a standard poly tarp as a highly temporary solution meant to last no longer than 30 to 90 days. UV radiation from direct sunlight will rapidly break down the thin plastic strands, making them brittle and prone to tearing if left exposed for multiple seasons.
-
Insurance Documentation and Progress Recording
Maintaining a detailed, unedited archive of your property damage and temporary mitigation efforts ensures that subsequent insurance claims and permanent structural rebuilds proceed smoothly without technical delays.
Systematizing Insurance Assets
Property owners should compile an organized digital folder containing geolocated, time-stamped photographs of the bare damage before the tarp is laid, detailed material receipts for every structural screw and lumber strip used, and official contractor invoices that feature specific line items for labor and assessment fees.
Illustrative Claims Tracking Profiles
-
Example A: A homeowner records a date-stamped video showing a large tree limb puncturing the roof deck before a restoration crew installs a tarp. This clear physical proof demonstrates to their insurance adjuster that the initial structural breach was caused directly by an insurable wind event.
-
Example B: During a complex regional storm dispute, a property owner presents an official itemized bill detailing the specific hours spent building temporary supports over a rafter hole. This documentation ensures rapid reimbursement under the policy’s mandatory “reasonable mitigation of loss” clause.
-
Example C: An owner photographs the structural layout showing the top edge of the tarp properly tucked beneath the upper shingle rows, proving that any subsequent moisture damage was not caused by a careless, faulty temporary installation.
Closing Summary
Successfully managing a property emergency through an emergency tarp roof repair service near me framework depends on balancing rapid deployment timelines with safe, mechanically sound anchoring practices. While a temporary roof tarp represents a short-term intervention rather than a permanent fix, it serves as a critical asset protection step that shields a building’s interior spaces from costly water damage. By ensuring deep screw penetration through wood furring strips, extending the plastic wrap safely over the roof ridge line, and maintaining clear photographic documentation for your insurance provider, property owners can safely navigate the window between initial storm damage and final, permanent restoration.
Frequently Asked Questions (FAQ)
How long can a professional emergency roof tarp stay on before leaking?
A standard woven polyethylene tarp secured with wood furring strips generally provides reliable protection for 30 to 90 days. Over time, continuous exposure to direct UV sunlight and fluctuating winds will slowly degrade the plastic, making it brittle and prone to tearing. If permanent roof repairs are delayed for multiple months, you should upgrade to a heavy-duty vinyl tarp or a hot shrink-wrap system, which are engineered to last up to a full year.
Will my homeowner insurance policy pay for the cost of an emergency roof tarping service?
Yes, the vast majority of standard homeowner insurance policies fully cover the cost of emergency tarping services, provided the underlying damage was caused by a covered peril (such as a windstorm, heavy hail, or a fallen tree limb). Insurance policies contain a strict “mitigation clause” that legally requires the property owner to take immediate, reasonable steps to prevent secondary water damage after a breach occurs.
Can you secure a roof tarp without screwing holes into the remaining shingles?
Screwing wood furring strips directly through shingles into the underlying wood deck is the most secure and reliable method to prevent a tarp from blowing away during high winds. However, if you want to avoid adding screw holes to an area with perfectly intact shingles, technicians can utilize alternative non-penetrating tactics. These include using heavy sandbag ballasts along the edges, applying high-bond adhesive membranes, or running a full-coverage shrink-wrap layer that uses heat to form a tight grip around the perimeter fascia boards.