Guide to Covered Patio Costs, Designs, and Construction
Expanding a home’s living footprint into the outdoors is one of the most effective ways to maximize structural utility and enhance personal comfort. A covered patio bridges the gap between indoor climate control and outdoor environmental exposure, serving as a versatile venue for dining, relaxation, and entertainment. However, introducing a permanent or semi-permanent roof structure over an open outdoor space involves complex architectural, structural, and financial calculations.
Understanding the various factors that influence total expenditure is crucial before breaking ground on an outdoor renovation. This educational guide provides an exhaustive analysis of the structural approaches, material options, labor considerations, and logistical dependencies involved in exterior additions. Property owners will learn how to accurately categorize costs, plan structural integration, avoid common zoning pitfalls, and manage the long-term health of their outdoor investments.
Overview of Covered Patio Foundations and Financial Metrics
When analyzing the estimated cost to build a covered patio 2026, property owners must view the project as a combination of two distinct construction components: the ground-level foundation (the patio floor) and the overhead shelter (the roof or cover structure). The overall financial outlay is heavily dictated by whether a homeowner is retrofitting an existing, structurally sound concrete slab or building an entirely new covered space from undisturbed soil.
The primary objective of formulating an accurate expenditure baseline is to prevent mid-project funding deficits. Outdoor additions are subject to volatile material markets, localized building codes, engineering requirements for snow and wind loads, and utility relocations. A properly engineered covered patio protects the home’s primary structure from water intrusion, aligns with municipal property guidelines, and ensures the physical safety of its occupants during severe weather.
Major Structural Categories and Material Approximations
The overhead protection system can be built using several architectural techniques. The choice of structure directly influences the durability, architectural integration, and financial commitment required for the addition.
Structural Framework and Overhead Options
| Category / Type | Description | Common Use Case | Time / Cost / Effort Level |
| Solid Gable or Hip Roof | A fully framed, shingled triangular roof that ties directly into the main home’s existing roofline. | High-end structural extensions designed to match traditional residential architecture perfectly. | High time investment; Maximum cost; High professional effort. |
| Attached Shed Roof | A single-sloped structural roof surface that attaches to the home’s exterior wall fascia or rafter tails. | Cost-effective, straightforward solid coverage for linear patio footprints. | Medium time investment; Moderate cost; Moderate effort. |
| Motorized Louvered Roof | An aluminum structure featuring automated, adjustable slats that open for sunlight and close for rain. | Modern, high-technology landscapes requiring flexible environmental control. | Low construction time; High material cost; Low physical effort. |
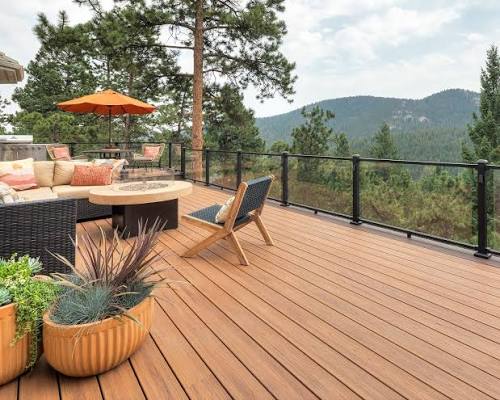
| Open-Lattice Pergola | A timber or composite framework of posts and crossbeams that offers partial, dappled shade without a solid barrier. | Arid climates or garden paths where complete precipitation blockage is unnecessary. | Medium time investment; Low to Moderate cost; Moderate effort. |
| Retractable Fabric Awning | A tensioned canvas or synthetic cover mounted to the exterior wall that extends manually or via an electric motor. | Properties with seasonal usage or strict space limitations that prevent permanent posts. | Very low installation time; Low cost; Minimal effort. |
Selecting the ideal configuration requires balancing architectural compatibility with local climate demands. For instance, heavy snow regions generally require the load-bearing capacity of a framed solid gable roof, whereas regions prone to high sun exposure but low rainfall may benefit more from modular aluminum or louvered systems.
Practical Design Scenarios and Environmental Applications
To contextualize the implementation of these structures, consider three distinct thematic applications tailored to different spatial and functional needs.
Scenario 1: The Essential Attached Shed Extension
This configuration focuses on providing reliable, cost-effective weather protection over a standard suburban back patio utilizing streamlined structural attachment methods.
-
Key Components: A 12-by-14-foot single-slope roof attached to the home’s ledger board, supported by treated timber posts, covered in standard asphalt shingles matching the main house, with an unpainted beadboard ceiling finish.
-
Relevance: This scenario fits property owners looking for maximum square-footage utility and complete rain blockage without incurring the high architectural engineering fees associated with multi-slope roof tie-ins.
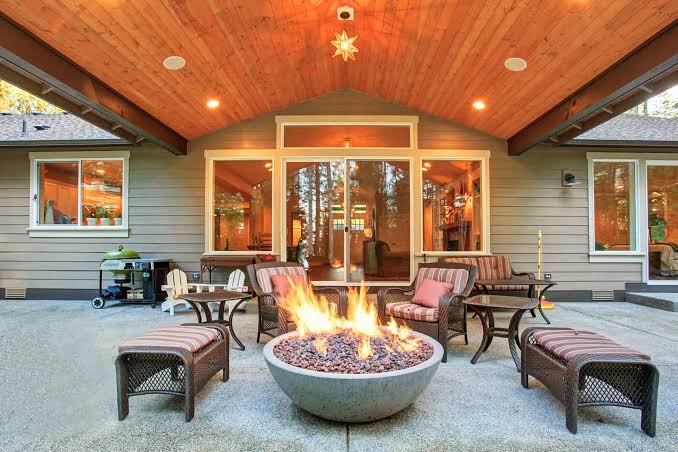
Scenario 2: The Premium All-Weather Pavillion
A large-scale, freestanding or complex gabled structure designed to serve as an independent outdoor living room equipped with integrated climate and electrical systems.
-
Key Components: A 20-by-20-foot gabled roof with exposed structural trusses, reinforced concrete footings sunk beneath the frost line, integrated recessed LED lighting, dual ceiling fans, a finished tongue-and-groove cedar ceiling, and a stamped concrete floor slab.
-
Relevance: This system serves homeowners in regions with variable seasons who want a fully illuminated, shielded space capable of hosting heavy furniture and entertainment appliances safely year-round.
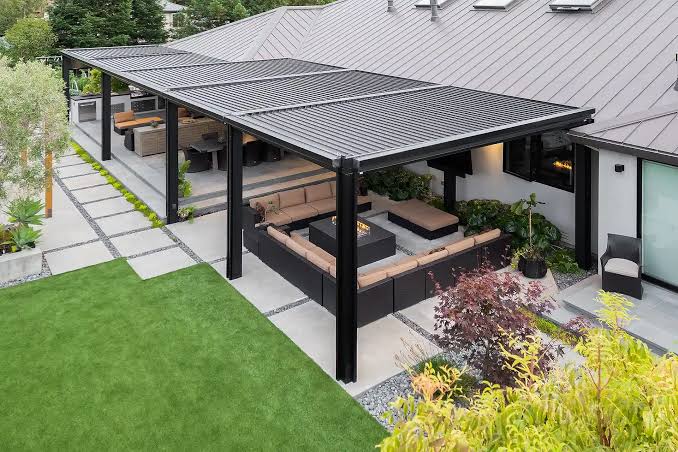
Scenario 3: The Automated Architectural Louver
A sleek, modern minimalist installation prioritizing clean lines, rust prevention, and immediate adjustments to changing daily weather patterns.
-
Key Components: An extruded powder-coated aluminum freestanding frame measuring 12-by-18 feet, featuring motorized louvers with built-in rain sensors that automatically close at the onset of precipitation, and hidden internal gutter downspouts.
-
Relevance: Ideal for contemporary architectural styles and coastal zones where wood rot, salt air exposure, and rapid transitions between intense sun and sudden downpours are primary concerns.
Comparative Evaluation
Scenario 1 offers basic structural permanence at an entry-level financial threshold, making it highly accessible. Scenario 2 scales the engineering complexity significantly, trading structural simplicity for luxury and multi-season utility. Scenario 3 replaces traditional building materials with mechanical engineering, offering high flexibility and minimal maintenance at a premium price point.
Comprehensive Budgetary and Resource Frameworks
Developing an accurate financial baseline is vital because sub-surface conditions, structural attachments, and local permit regulations can easily double the cost of basic building kits. When evaluating the estimated cost to build a covered patio 2026, the total budget must account for structural engineering, material delivery, and specialized trade labor.
Sample Project Budget Framework
| Category | Estimated Amount / Effort | Explanation | Optimization Tips |
| Engineering, Zoning & Permits | $600 – $2,500 | Structural blueprint drafting, site surveys, HOA approvals, and municipal building permits. | Acquire certified site plans early to prevent structural revisions during municipal review. |
| Sub-Surface Footings & Masonry | $2,500 – $7,000 | Excavating frost-line piers, pouring concrete footings, and pouring or laying the patio floor. | If pouring a new slab, install the structural roof post footings simultaneously to save on concrete delivery fees. |
| Structural Frame Construction | $4,000 – $12,000 | Purchasing and erecting the support posts, headers, rafters, or engineered metal frames. | Utilizing pre-engineered metal or treated wood reduces raw lumber fabrication labor on-site. |
| Roofing Materials & Finishing | $3,000 – $8,500 | Installing sheathing, underlayment, shingles or metal panels, gutters, and interior ceiling trim. | Match the house’s existing roofing material brand and color to avoid purchasing small, expensive custom batches. |
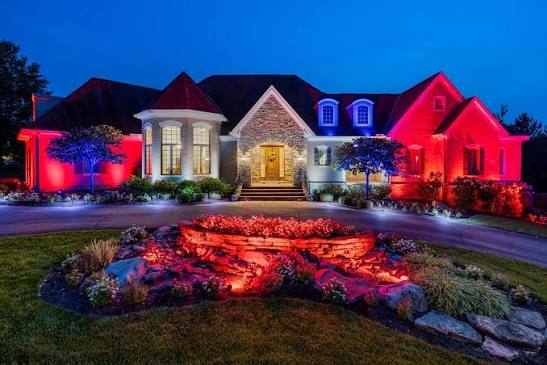
| Electrical & Mechanical Additions | $1,200 – $4,000 | Running exterior-rated conduits for ceiling fans, ambient lighting, sound systems, or heaters. | Execute all wire pulling before the ceiling finish is enclosed to avoid costly demolition later. |
Note: The cost parameters outlined above represent structural examples based on standard macroeconomic labor and material averages. Actual field quotes will fluctuate based on localized labor rates, terrain slope, site accessibility, and regional building code stringency.
Construction Strategies and Support Options
Homeowners can execute the construction phase through several project delivery methods, depending on their technical competency and available time.
1. Independent General Contractors
Hiring a licensed, bonded general builder to oversee all aspects of construction, from excavation to final shingling.
-
Advantages: Assumes full legal and physical liability for the build; manages subcontractors for specialized trades like electrical work.
-
Disadvantages: Includes a contractor markup fee, resulting in higher upfront outlays.
2. Prefabricated Component Kits
Purchasing factory-cut aluminum, vinyl, or wood kits that arrive on-site with pre-machined connection points.
-
Advantages: Predictable component quality; reduces raw material waste; highly suitable for advanced DIY builders or direct labor assembly.
-
Disadvantages: Fixed geometric configurations; structural engineering may not meet specialized regional snow or seismic load requirements without modifications.
3. Specialized Awning and Shade Firms
Engaging a firm that focuses exclusively on fabric, vinyl, or extruded aluminum architectural shade solutions.
-
Advantages: Rapid installation timelines, often completing assembly within one to three days; highly efficient specialized equipment.
-
Disadvantages: Limited ability to perform heavy masonry or structural home-roof integrations.
Navigating Structural Risks and Enforcement Challenges
Outdoor additions are structurally vulnerable because they are directly exposed to updrafts, snow accumulation, and shifting soil conditions. Mitigating these risks during the planning phase is imperative.
-
Inadequate Footing Depth: Anchoring heavy roof support posts directly to a standard 4-inch concrete patio slab without dedicated sub-surface footings can cause the slab to crack and sink under the weight. In cold climates, frost heaving will displace the structure. Mitigation: Ensure support posts rest on poured concrete piers dug below your geographic region’s designated frost line.
-
Underestimating Wind Uplift Forces: A covered patio acts like a sail during high-wind events. If the structure is not anchored using heavy-duty steel tension ties and structural framing screws, wind can rip the roof off the posts or damage the home’s exterior wall. Mitigation: Specify hurricane ties (e.g., Simpson Strong-Tie) at every critical wood-to-wood and wood-to-concrete intersection.
-
Improper Roof Pitch and Drainage: Building a flat or under-sloped roof structure causes water to pool, leading to premature roof failure, wood rot, and leaks at the house attachment ledger. Mitigation: Maintain a minimum slope of 1/4 inch per foot for solid patio covers, and integrate a complete seamless gutter system to direct rainwater away from the foundation.
Long-Term Maintenance and Asset Management
To preserve the safety and visual appeal of a covered patio, owners must execute a structured, preventative maintenance protocol.
-
Bi-Annual Structural Maintenance Checklist:
-
Clean out gutters and downspouts to prevent water from backing up under the patio shingles or fascia boards.
-
Inspect timber framing for signs of wood-boring insects, dry rot, or splitting around structural bolt connections.
-
Check the flashing where the patio roof joins the house wall to ensure the waterproof seal remains intact.
-
-
Material-Specific Care Cycles:
-
Wood Structures: Re-stain or re-seal timber posts and beams every 3 to 5 years to block UV degradation and water absorption.
-
Aluminum Structures: Power-wash framework annually using a non-abrasive detergent to remove salt, pollen, and debris that can compromise the finish.
-
Documentation, Permissions, and Asset Verification

Comprehensive documentation guarantees that subsequent property transactions, insurance claims, and structural modifications occur without legal delays.
Organizing Information Efficiently
Property owners should catalog all permits, architectural prints, engineering calculations, and material receipts within a secure property file. This file verifies that the addition was constructed legally and to standard.
Illustrative Documentation Examples
-
Example A: A homeowner retains the stamped certificate of occupancy from the local municipal inspector, proving to future home buyers that the attached shed roof satisfies all safety codes.
-
Example B: During an appraisal for a home refinance, the owner provides structural drawings proving the patio addition added permanent, permitted square footage to the property’s usable footprint.
-
Example C: Following a severe storm, an insurance policyholder presents original material invoices for premium cedar timber posts, ensuring accurate replacement value reimbursement.
Closing Summary
Building a covered patio is a substantial structural upgrade that requires a deliberate balance between architectural intent, environmental compliance, and budgeting. By properly identifying the right structural approach, planning for deep footings and proper drainage, and accounting for localized labor and permitting variables, homeowners can successfully execute a project that drastically improves their property’s long-term utility and value.
Frequently Asked Questions (FAQ)
What is the difference between an attached and a freestanding covered patio?
An attached covered patio relies on the existing home’s structural framing (via a ledger board) for half of its support, requiring precise flashing to prevent home water leaks. A freestanding patio cover is completely self-supporting on its own set of perimeter posts and footings, eliminating structural modifications to the main house.
How do snow loads affect the design of a patio roof?
In regions with heavy winter weather, the roof rafters, headers, and vertical support posts must be engineered to hold the maximum anticipated weight of accumulated snow. This requires thicker timber dimensions or heavy-gauge metal framing, along with a steeper roof pitch to encourage snow sliding.
Can a covered patio be converted into a fully enclosed sunroom later?
Yes, provided the original structure was engineered with this future transition in mind. Converting a covered patio requires that the initial concrete foundation slab and footings be poured to withstand the weight of full perimeter glass or insulated walls, rather than just simple overhead posts.