Exterior Stone Veneer Panels: Installation & Cost Guide
Upgrading the protective exterior envelope of a building with stone provides structural presence and lasting visual appeal. Historically, achieving a masonry finish required thick, load-bearing full-bed stone walls supported by dedicated foundation ledges. Modern building methods, however, frequently utilize thin exterior stone veneer panels. These engineered systems consist of thin-cut natural stone or molded cementitious aggregates arranged in interlocking modular panels. They mount directly to existing architectural wall assemblies without requiring structural foundation changes.
Successfully planning, estimating, and managing a stone cladding installation requires a solid understanding of structural engineering, moisture management, and cost estimation frameworks. This guide provides an objective, educational analysis of the physical construction steps, product classifications, labor costs, and long-term asset management protocols involved in veneer installations. Property owners and project coordinators will learn how to evaluate substrate requirements, balance structural specifications, calculate realistic budgets, and ensure code compliance across varying regional climates.
Overview of Exterior Veneer Panel Engineering
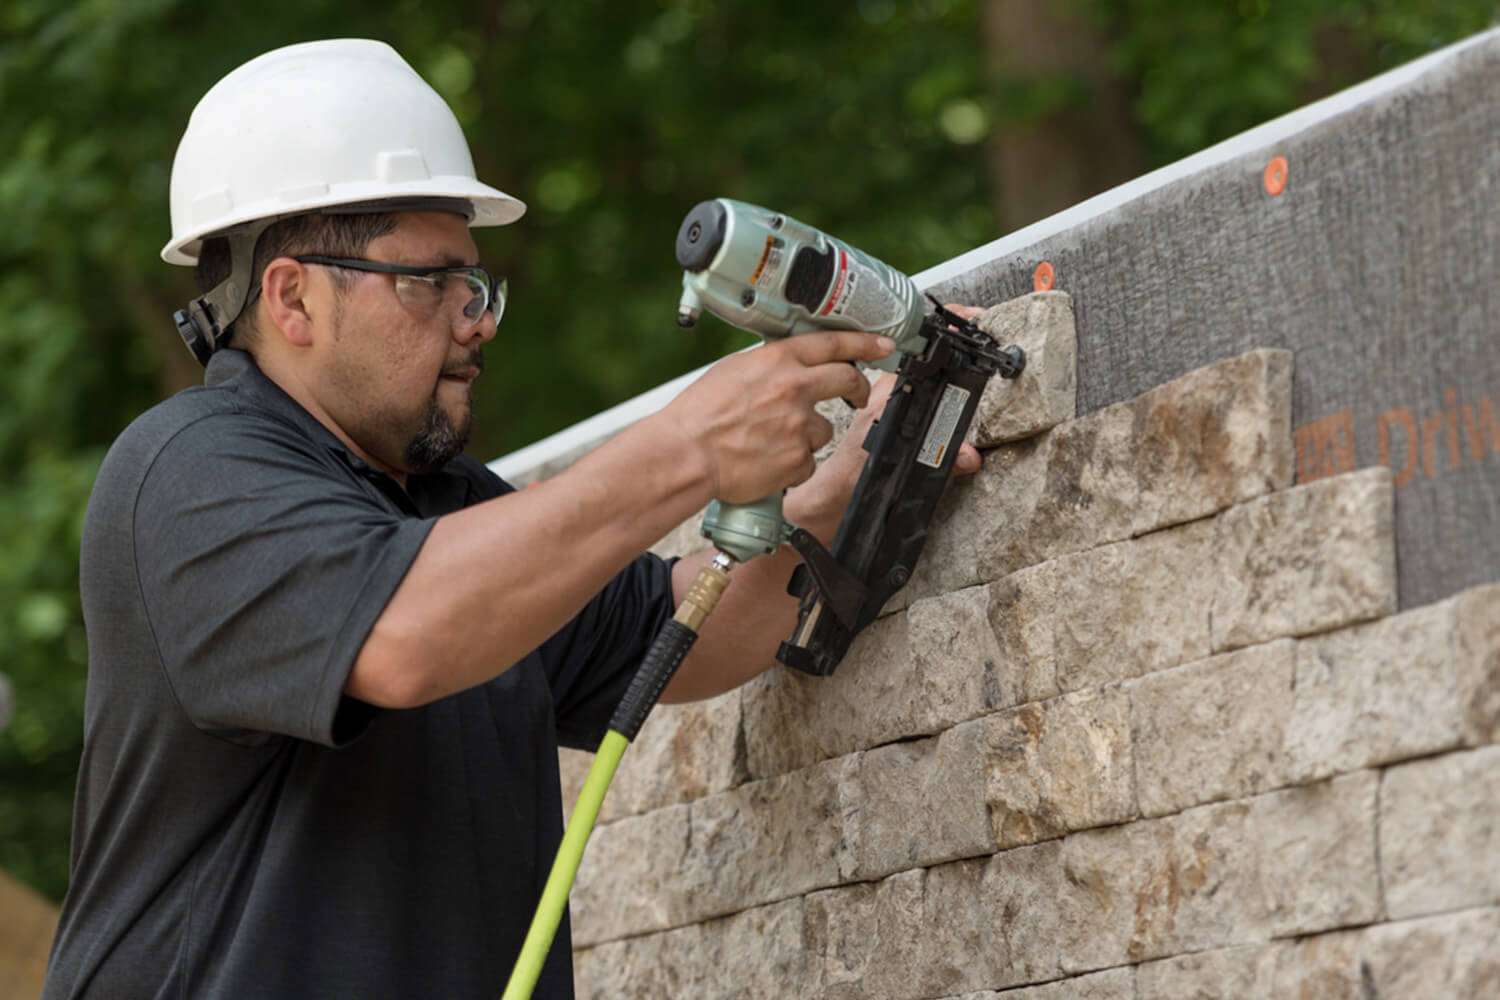
When property owners evaluate a structural remodel using an exterior stone veneer panels cost installation framework, the primary financial calculation must look beyond the surface cost of the decorative stone. In architectural terms, a veneer panel functions as a non-load-bearing exterior cladding system. The physical installation requires a precise sequence of tasks: assessing the underlying structural wall capacity, applying a continuous weather-resistive barrier, mounting heavy galvanized steel lath or track systems, and setting the panels securely using modified mortar or specialized mechanical fasteners. Because these panels hold considerable weight, the condition and structural soundness of the home’s existing wood sheathing or concrete block wall directly impact the total project scope.
The core objective of using a formal estimation framework is to prevent mid-project structural delays or failures caused by poor substrate preparation or incorrect weight calculations. Standard exterior stone panels weigh between 7 and 15 pounds per square foot. This dead load exerts permanent downward gravity and lateral wind pressures on the vertical framing studs. A properly engineered stone veneer installation complies with local building safety codes, integrates seamlessly with existing window flashing paths, prevents internal wall moisture retention, and provides a durable exterior finish that withstands seasonal freeze-thaw cycles.
Product Classifications and System Specifications
Exterior stone veneer panel systems are categorized by their material composition, manufacturing methods, and mechanical attachment hardware.
Exterior Stone Veneer Panel Material Typologies
| Category / Type | Description | Common Use Case | Time / Cost / Effort Level |
| Manufactured / Cultured Stone Panels | Portland cement, lightweight aggregates, and iron oxide pigments cast in molds to mimic natural stone textures. | Residential exterior accent walls, foundations, and modern wainscoting details. | Medium installation time; Moderate cost; Moderate physical effort. |
| Natural Thin-Cut Stone Panels | Slabs of real quarried stone (e.g., limestone, granite, quartz) machine-sliced to a 1-to-1.5-inch thickness and arranged onto mesh backings. | Premium commercial facades and high-end estate remodeling seeking absolute mineral realism. | High installation time; High material cost; High physical effort. |
| Mortarless / Clip-System Panels | Engineered panels designed with integrated metal tabs or interlocking tracks that screw directly into wall sheathing. | Rapid installations or dry-stack themes where weather limitations prevent wet mortar work. | Low installation time; High material cost; Low physical effort. |
| Flexible Ultra-Thin Polyurethane Slabs | High-density foam or polymer backing molded and colored to look like stone, installed with structural adhesives. | Light-duty outbuildings or covered exterior patio accents where structural weight constraints are critical. | Low installation time; Low material cost; Minimal physical effort. |
Selecting the ideal product configuration requires balancing regional weather vulnerabilities with structural weight allowances. While manufactured cementitious panels offer excellent uniformity and lower weight, natural thin-cut stone provides exceptional color permanence and resistance to chemical fading from intense sunlight. For colder climates prone to heavy frost, mortarless screw-in panel tracking systems are highly effective because they remove the risk of wet mortar freezing and cracking during winter installations.
Practical Construction Scenarios and Climate Applications
To illustrate how these engineering classifications translate to physical structures in the field, analyze three regional installation scenarios.
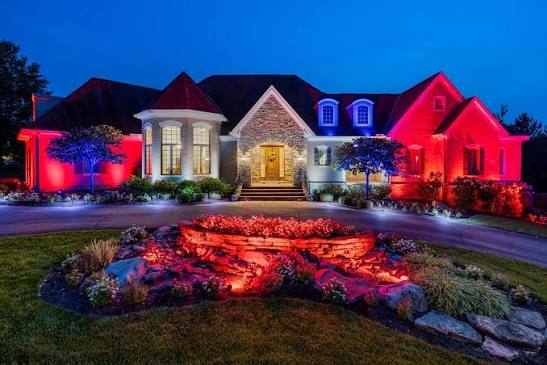
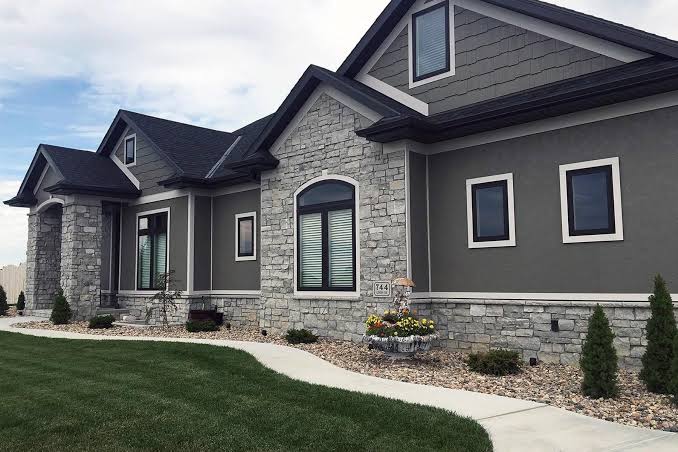
Scenario 1: The Modern Suburban Wainscoting Profile
A traditional front-elevation transformation designed to add a 4-foot stone accent border (wainscoting) to the lower half of a level, wood-sheathed two-story suburban home.
-
Key Components: A 400-square-foot linear footprint, manufactured cultured ledger-stone panels set in a polymer-modified thin-set mortar, installed over two layers of high-density weather-resistive barriers, wire lath, and an aluminum weep screed base.
-
Relevance: This layout provides a classic residential aesthetic change using affordable materials, serving as a reliable structural baseline for standard exterior remodeling calculations.
Scenario 2: The Multi-Story Natural Granite Facade
A large-scale, premium architectural cladding project covering the full exterior facade of an exposed, elevated coastal property facing high winds and salt air.
-
Key Components: A 1,500-square-foot surface area, real thin-cut quarried granite interlocking Z-panels, a heavy-duty stainless steel base support ledge, a liquid-applied elastomeric air and water barrier, and scratch-coat mortar application.
-
Relevance: This application addresses the challenges of multi-story weight management, wind-load shear stresses, and harsh marine environments, serving as a critical reference point for complex structural stone masonry.
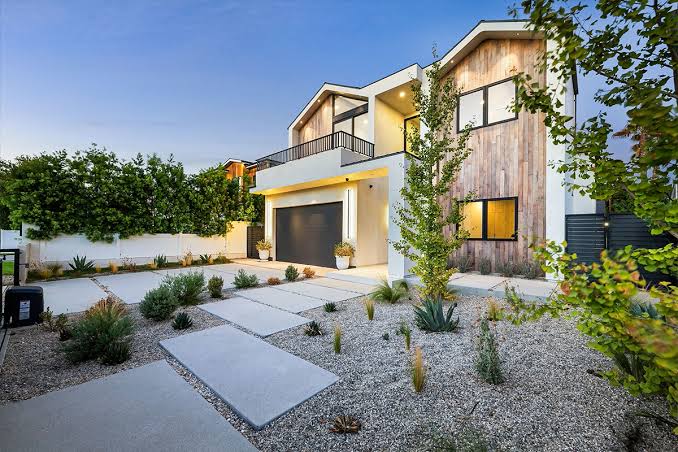
Scenario 3: The Northern Cold-Zone Dry-Stack Entryway
An installation executed in a high-latitude region prone to sub-zero winter temperatures, severe ground moisture, and frequent freeze-thaw cycles.
-
Key Components: A 250-square-foot entry wall, mortarless concrete panels utilizing integrated galvanized steel mounting brackets screwed directly into 5/8-inch exterior plywood sheathing, with an absolute 1/2-inch structural drainage air gap cavity behind the stone.
-
Relevance: This shows how an interlocking mechanical system can completely bypass wet mortar steps. This setup eliminates freeze-cracking risks and allows internal wall condensation to drain away safely into the soil below.
Comparative Evaluation
Scenario 1 leverages manufactured stone and wet-mortar steps to deliver excellent curb appeal at an entry-level cost per square foot. Scenario 2 scales structural engineering significantly, utilizing heavy natural granite panels and advanced liquid barriers to handle marine corrosion and high dynamic wind lifts. Scenario 3 replaces traditional mortar work with mechanical clip engineering, prioritizing freeze protection and drainage flexibility over modular simplicity.
Technical Budgeting, Substrate Prep, and Resource Allocation Matrices
Developing a precise budget for a stone veneer project requires separating the raw panel material expenses from the essential substrate preparation work. When planning expenditures using an exterior stone veneer panels cost installation framework, the macro-level planning must account for wall structural reinforcement, moisture barriers, trim components, and specialized trade masonry labor.
Sample Project Budget Framework
| Category | Estimated Amount / Effort | Explanation | Optimization Tips |
| Engineering Seals & Local Permits | $300 – $1,200 | Structural loading calculations, municipal zoning check-offs, and building permit processing. | Sourcing pre-tested panels with verified ICC-ES building compliance reports can lower independent engineering design fees. |
| Siding Removal & Wall Deconstruction | $1.00 – $2.50 per sq. ft. | Stripping old vinyl, wood, or fiber-cement siding, inspecting sheathing for damage, and hauling away waste materials. | Coordinate siding removal with dry summer weather to prevent exposed interior insulation from absorbing unexpected rain. |
| Moisture Barriers & Metal Lath | $1.50 – $3.50 per sq. ft. | Installing two layers of weather-resistive wrap, self-adhering flashing tape, aluminum weep screeds, and galvanized wire mesh. | Never compromise on water management materials; internal water rot is the primary cause of framing failure behind stone veneer. |
| Premium Stone Veneer Panels | $5.00 – $18.00 per sq. ft. | Sourcing specified manufactured block units, natural thin-cut slate/granite Z-panels, or mechanical clip-systems. | Order standard rectangular panel dimensions to reduce custom cutting waste to a efficient 5% to 10% ceiling limit. |
| Trim Pieces, Caps, & Mortar Mixes | $1.50 – $4.00 per sq. ft. | Sourcing matching stone window sills, corner pieces, electrical outlet blocks, and polymer-modified type-S mortar. | Purchasing dedicated factory corner pieces speeds up labor execution and eliminates raw edge cuts. |
| Specialized Masonry Crew Labor | $6.50 – $18.00 per sq. ft. | Labor for installing flashing, mixing structural mortar, handling heavy wet saws, hand-setting panels, and final joint tooling. | Hire crews certified by national masonry and tile associations to ensure scratch-coats adhere correctly to the lath matrix. |
Note: The cost distributions and material parameters outlined above serve as illustrative structural examples based on standard national material indices. Final field quotes will fluctuate according to localized labor rates, ease of scaffold site access, specific wall height configurations, and current fuel transport surcharges.
Project Management Frameworks and Procurement Sourcing
Property owners can execute the procurement and assembly phase through several distinct project management channels, depending on their technical experience and available time.
1. Dedicated Turnkey Masonry & Cladding Firms
Engaging a professional siding company whose crews focus primarily on building high-load stone veneer facades, brick veneers, and structural stucco finishes.
-
Advantages: Assumes full legal and physical liability for the build; manages municipal inspections and overlapping scaffolding trades; provides unified structural warranties.
-
Disadvantages: Commands premium labor rates and general contractor management markup overhead.
2. General Remodeling Crews Sourcing Pre-Engineered Kits
Hiring a broad-scope residential builder who procures pre-engineered modular clip systems or interlocking mortarless panel configurations from national architectural suppliers.
-
Advantages: Predictable assembly timelines; lowers specialized masonry labor costs; easily fits into a general siding replacement schedule.
-
Disadvantages: Restricted to the manufacturer’s specific geometric color profiles and trim options.
3. Material Coordination and Independent Assembly (Owner-Builder)
The property owner manages the project independently by ordering bulk stone pallets directly from a distributor, renting wet saws, stripping the old siding, and hiring local independent stone masons for hourly assembly.
-
Advantages: Eliminates middle-tier general contractor markups, providing the lowest direct capital investment per square foot.
-
Disadvantages: The homeowner assumes complete financial risk for incorrect layout measurements, stone fracturing during cuts, and municipal permit code violations.
Mitigating Building Risks, Code Enforcement, and Water Failures
Exterior stone veneer panels are heavy, rigid structures exposed to severe outdoor environments. Failing to adhere to strict water management and physical engineering principles during installation will quickly result in framing rot, panel delamination, or systemic wall collapse.
-
Omission of the Drainage Plane (Hidden Structural Wood Rot): The most common error in stone veneer installation is trapping moisture behind the stone layer. Stone and mortar are naturally porous and absorb rainwater. If you install mortar directly onto a single layer of standard housewrap, water will pass through, soak the underlying wood sheathing, and rot the structural wall studs. Prevention: Install a strict dual-barrier system consisting of two independent layers of water-resistive wraps, or specify a dedicated plastic dimpled drainage mat to form a 1/4-inch space where water can drain away freely.
-
Omitting or Blocking the Weep Screed at the Foundation Base: If the mortar and stone panel matrix are run all the way down into the loose topsoil without a bottom escape path, water trapped behind the wall will pool along the sill plate. This can rot the bottom wood framing and invite pest infestations. Prevention: Install an aluminum or galvanized steel weep screed with built-in drainage holes at the absolute bottom line of the framing. Keep this screed a minimum of 4 inches above raw earth or 2 inches above paved concrete sidewalks.
-
Inadequate Structural Bonding (Panel Delamination): Applying standard, unmodified cement mortar to slick, dry sheathing or un-cleared concrete walls can lead to bond failure. Over time, environmental vibrations or freeze-thaw shifts will cause the stone panels to separate and fall off the wall. Prevention: Ensure a strict wire lath grid matrix is anchored to the wall framing using galvanized roofing nails spaced every 6 inches, and utilize specialized polymer-modified masonry mortar built to meet ASTM C270 standards.
Long-Term Maintenance and Asset Management Protocols
While a properly engineered stone exterior avoids the rot, denting, and insect vulnerability common to wood and thin vinyl panels, preserving its performance requires a consistent, low-effort care routine.
-
Bi-Annual Maintenance Checklist:
-
Spring Post-Thaw Audit: Walk the exterior stone wall to check that winter frost shifting has not cracked the grout joints or loosened individual panels from their anchoring track lines.
-
Fall Drainage Audit: Check the drainage holes along the bottom weep screed line to clear away dirt, leaves, or mulch blockages, ensuring trapped water can exit freely before freezing.
-
Vegetation Clearance: Clear away climbing ivy, deep-rooting vines, or dense perimeter bushes growing directly against the stone panel face, as these trap humidity and root into grout lines.
-
-
Material-Specific Rinsing and Sealing Cycles:
-
Wash panels annually using a standard low-pressure garden hose and a soft brush with a pH-neutral cleaner to remove dirt, efflorescence (white salt deposits), and pollen. Never use a high-pressure power washer closer than 12 inches from the panels, as this can fracture the grout lines or force water deep behind the weather barrier.
-
Performance Verification and Construction Progress Documentation
Maintaining an organized archive of your building plans ensures subsequent home inspections, insurance updates, or structural renovations proceed smoothly without technical delays.
Systematizing Project Records
Property owners should compile an organized file folder or digital archive containing signed municipal permits, structural engineering data sheets, material slips showing stone classification, and date-stamped photographs of subsurface construction layers (such as flashing installations and wire lath fastening spacing).
Illustrative Structural Documentation Profiles
-
Example A: A homeowner files a photograph of the open wall assembly showing that the galvanized lath was fastened directly into the vertical wood studs rather than just the thin plywood sheathing. This proof satisfies a municipal inspector’s safety compliance audit during a home refinance.
-
Example B: During a real estate transaction, the seller presents a certificate proving that their manufactured stone panels possess a verified Class A fire rating, validating the premium structural safety value added to the estate.
-
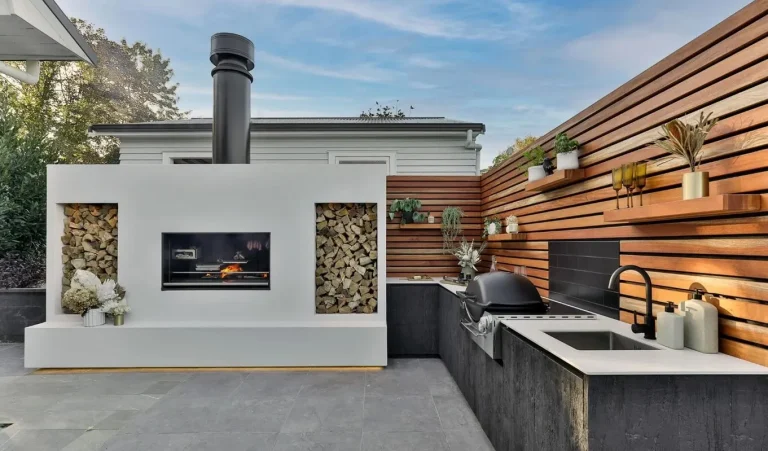
Example C: An owner stores the specific manufacturer color batch and product codes for their mortarless interlocking clip panels, making it simple to order a matching batch if they choose to extend the stone work around a backyard outdoor kitchen years later.
Closing Summary
Successfully planning and executing an exterior cladding renovation using an exterior stone veneer panels cost installation framework depends on balancing meticulous water management preparation with appropriate material selection. While thin stone veneer panels require a higher initial investment of labor and capital than basic vinyl or wood siding, they deliver unmatched durability, exceptional resistance to impact, and a classic look that enhances a property’s long-term asset value. By ensuring a proper dual-layer weather barrier,
Frequently Asked Questions (FAQ)
What is the purpose of an aluminum weep screed in stone veneer installation?
An aluminum weep screed is a specialized metal flashing trim installed at the absolute bottom line of a vertical wall assembly. It features a perforated edge that allows any rainwater or condensation that penetrates the porous stone panels to drain out safely, preventing moisture from pooling and rotting the lower wood framing foundation.
Can stone veneer panels be installed directly over existing vinyl or wood siding?
No. Stone veneer panels cannot be safely installed directly over vinyl, wood lap siding, or fiber-cement boards. The existing siding must be fully removed down to the flat plywood or OSB sheathing. This step allows installers to inspect the framing for hidden rot, apply a continuous weather barrier, and anchor wire laths or metal tracks directly into the structural vertical studs to support the weight of the stone.
What is the difference between dry-stack and grouted stone veneer installations?
A dry-stack installation fits the stone veneer panels tightly together without visible mortar lines between the individual units, creating a clean, modern texture. A grouted installation leaves distinct gaps between the stones that are filled with masonry mortar after the panels are mounted, providing a traditional look and a tighter seal against water entry.