Hail Damage Roof Insurance Claim Checklist & Guide
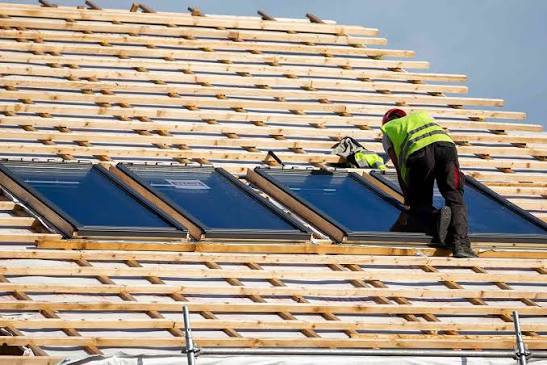
Severe convective storms capable of producing high-velocity hail present a significant threat to residential and commercial roofing systems. When frozen precipitation strikes a roof, the kinetic energy transferred upon impact can fracture underlying fiberglass mats, dislodge protective mineral granules, warp metal panels, and split wood shakes. Because roofing systems serve as the primary defensive barrier against the elements, unaddressed hail impact marks can quickly lead to hidden water leaks, rotted wood decking, structural framing mold, and eventual ceiling failure.
Successfully navigating the multi-staged property claims process requires an organized approach that blends meteorological recording, physical damage documentation, and insurance policy compliance. This educational guide breaks down the administrative, structural, and legal variables involved when adjusting a property after a storm. By exploring detailed documentation frameworks, common adjustment scenarios, and strategic resource allocation plans, property owners will establish an objective foundation to protect their structural assets and effectively manage the full lifecycle of a roofing insurance claim.
Overview of Hail Impact Claims Processes
When property owners organize their post-storm documentation using a hail damage roof insurance claim checklist, the primary goal is translating physical field evidence into a structured, verifiable insurance package. In structural engineering and insurance terms, a roof claim is a legal adjustment process governed by strict policy conditions and filing deadlines. The total process requires proving a direct link between a specific, documented storm date and the physical loss of structural integrity across the roof surface.
The core purpose of deploying a systematic inspection framework is to separate functional cosmetic blemishes from structural functional damage. Insurance adjusters define functional hail damage as an impact that diminishes the water-shedding capacity of the roofing material or shortens its expected operational lifespan. Because roofs are exposed to continuous wear and aging, the property owner must document the specific characteristics of recent hail strikes—such as fresh black fractures on asphalt shingles, bruised underlayments, or dented soft metals—to distinguish them from long-term weathering, blistering, or manufacturing defects. A properly managed file ensures absolute compliance with the policyholder’s duties after a loss, minimizes claim denials, and structures the project for a complete roof restoration.
Core Documentation Classifications and Claim Frameworks
Claims documentation can be split into distinct administrative and structural categories based on the source of data and the specific phase of the verification timeline.
Property Claims Component Matrix
| Category / Type | Description | Common Use Case | Time / Cost / Effort Level |
| Meteorological Verification Data | Third-party radar logs, weather station metrics, and local news reports verifying exact hail stone sizing. | Establishing the official date of loss to satisfy strict policy filing deadlines. | Low time investment; Low cost; Minimal physical effort. |
| Ground-Level Collateral Evidence | Detailed photography of dented copper downspouts, fractured vinyl siding, bruised garage doors, or shredded vegetation. | Supporting the roof claim by proving the storm carried enough kinetic force to damage hard metals. | Low time investment; Zero cost; Moderate physical effort. |
| Direct Roof Surface Documentation | High-resolution close-ups of chalked test squares showing granular loss, fiberglass fractures, or dimpled metal seams. | The primary evidence pack submitted to the claims department to establish functional roof damage. | Medium time investment; Low cost; High physical effort. |
| Independent Structural Valuation | A comprehensive, line-itemized repair invoice generated using industry-standard pricing databases. | Negotiating the scope of work and reconciling price differences between the contractor and the adjuster. | Medium time investment; Moderate cost; Moderate professional effort. |
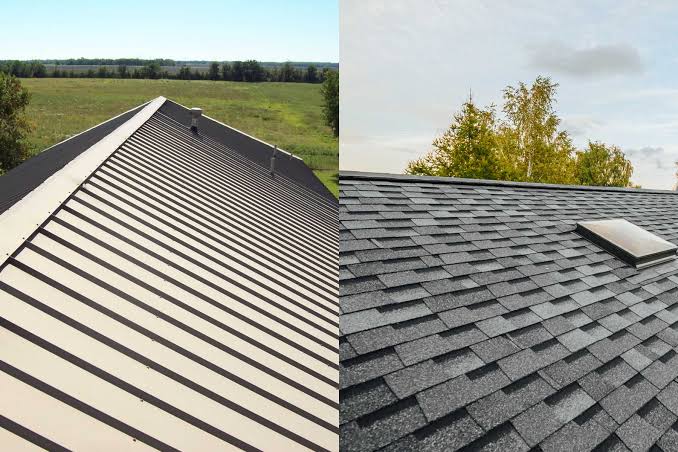
Selecting the ideal configuration of proof depends entirely on the clarity of the damage and the complexity of the property’s design. In straightforward situations with large hail (over 1.5 inches), ground-level collateral and direct surface photos are usually enough to secure claim approval. However, properties facing subtle micro-damage or architectural roofs (such as slate or concrete tile) typically require specialized engineering reports and third-party radar tracking to overcome initial insurer denials.
Practical Assessment Scenarios and Field Applications
To illustrate how these claims principles function in the field, analyze three common physical property scenarios utilizing a comprehensive hail damage roof insurance claim checklist.
Scenario 1: The Suburban Asphalt Shingle Storm Strike
A traditional residential home with a 2,500-square-foot architectural shingle roof exposed to a verified spring storm producing 1.25-inch diameter hail.
-
Key Steps: 1. Retrieve local weather bureau radar reports verifying the exact storm cell timeline.
2. Inspect ground-level soft metals, documenting deep spatter marks on aluminum window trim and downspouts.
3. Perform a safe roof walk to locate circular fractures, granular displacement, and exposed black asphalt mats.
4. File the initial loss notification with the insurer within the designated policy window.
-
Relevance: This baseline scenario represents a standard residential assessment, serving as a framework for tracking standard depreciation and material replacement metrics.
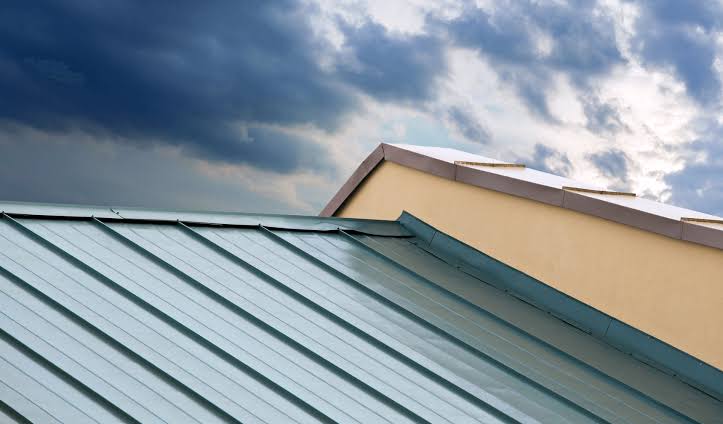
Scenario 2: The Multi-Family Standing Seam Metal Facade
An expansive commercial or multi-family property utilizing high-performance standing seam steel roof panels, struck by a fast-moving front carrying 1.5-inch hard hail.
-
Key Steps:
-
Map the full perimeter roof footprint using drone photography to track the path of the storm.
-
Use specialized chalking methods across seams and flat pans to check for finish cracking or structural dimpling.
-
Check internal attic spaces for structural deflection or micro-leaks along the rafter lines.
-
Coordinate a multi-party inspection including the property manager, contractor, and senior insurance adjuster.
-
-
Relevance: This application addresses the challenges of large-scale commercial weight allowances and cosmetic versus structural distortions, where metal panel structural stretching requires a full replacement rather than localized patching.
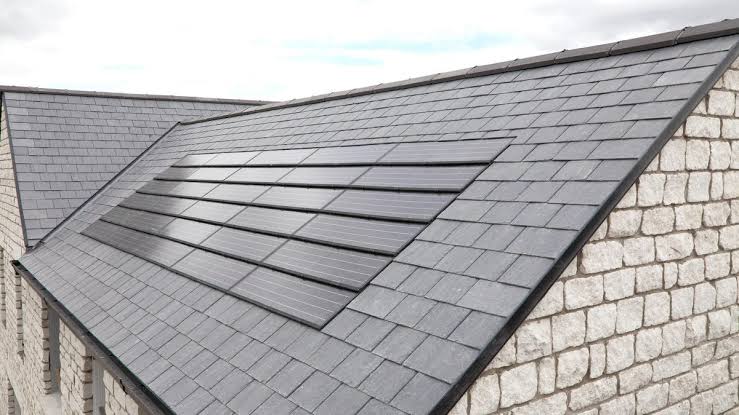
Scenario 3: The Luxury Natural Quarried Slate Remodel
A historic estate featuring an intricate quarried slate roof, located in a region hit by an unexpected severe weather cell carrying mixed hail stones.
-
Key Steps:
-
Engage a certified independent structural slate specialist to perform a hands-on tactile inspection.
-
Document clean, sharp, white fractures on slate edges indicating fresh impacts rather than old age delamination.
-
Verify that the underlying waterproofing membrane has not been pierced by sharp slate shards driven down by hail force.
-
Submit a specialized historic masonry restoration cost estimate to the insurance company.
-
-
Relevance: This shows the extreme technical care required for premium materials, proving that old weathering must be separated from recent storm damage to preserve the historic value of the structure.
Comparative Evaluation
Scenario 1 leverages standard residential shingle metrics and rapid surface inspections to process a straightforward replacement claim. Scenario 2 shifts away from simple material wear toward mechanical panel deflection, requiring extensive commercial tracking across wide surface areas. Scenario 3 moves completely into specialized masonry forensics, requiring expert testimony to document clean fractures on natural stone safely.
Technical Budgeting, Deductibles, and Resource Allocation
Developing an accurate budget framework for a storm restoration project requires separating the property owner’s out-of-pocket policy obligations from the insurer’s total payout settlement. When organizing documents with a hail damage roof insurance claim checklist, the financial calculations must account for policy deductibles, depreciation clauses (ACV vs. RCV), and regional labor metrics.
Sample Project Budget Framework (20 Squares / 2,000 Sq. Ft. Baseline)
| Category | Estimated Amount / Effort | Explanation | Optimization Tips |
| Policy Deductible Contribution | $1,000 – $5,000 | The specific out-of-pocket financial portion mandated by your insurance contract before policy funds apply. | Never work with a contractor who offers to “absorb” or waive your deductible; this practice constitutes insurance fraud in most states. |
| Actual Cash Value (ACV) Payout | $5,000 – $12,000 | The initial check issued by the insurer, representing the current depreciated value of the roof based on its age. | Deposit the ACV check into a dedicated project account to clear initial material delivery deposits quickly. |
| Depreciation Recoverable Holdback | $4,000 – $15,000 | The remaining insurance funds released only after the contractor submits a final invoice proving completion. | Verify your policy utilizes Replacement Cost Value (RCV) terms to ensure you can recover this holdback amount. |
| Supplemental Material Extensions | $500 – $2,500 | Funding for hidden defects found during tear-off, such as rotted wood decking or missing ice-and-water shields required by modern codes. | Ensure the contractor documents code violations using photographs to successfully secure supplemental approval from the insurer. |
| Core Material & Technical Labor | $9,500 – $29,500 | The total real-world invoice for tearing off old shingles, preparing substrates, and installing the new roof system. | Standardize your material upgrades (e.g., upgrading to impact-resistant shingles) during negotiation to lower out-of-pocket fees. |
Note: The financial parameters and policy metrics outlined above serve as illustrative examples based on standard insurance structures. Final numbers will fluctuate according to your specific policy declarations, localized labor indices, regional code updates, and the age and style of your roof.
Claims Adjustment Strategies and Sourcing Formats
Property owners can navigate the adjustment and negotiation phase through several professional channels, depending on the scale of the damage and the level of dispute with the insurer.
1. Preferred Contractor Network Coordination
Working directly with a certified local roofing company that provides integrated storm damage inspections and works directly with insurance platforms.
-
Advantages: Simplifies scheduling; the contractor meets the insurance adjuster on the roof to agree on the damage scope; uses standard pricing software to prevent pricing disputes.
-
Disadvantages: The contractor cannot legally act as your public insurance adjuster if the claim faces a formal coverage denial.
2. Independent Public Insurance Adjusters
Hiring a licensed private adjuster who represents the policyholder exclusively throughout the negotiation and settlement tracking loops.
-
Advantages: Expert policy interpretation; manages all phone calls, filings, and structural disputes; works to maximize your legal settlement payout.
-
Disadvantages: Typically charges a fee consisting of a percentage (10% to 15%) of the total insurance payout settlement.
3. Structural Engineering Consultation Sourcing
Engaging an independent structural or forensic engineer to perform scientific testing (such as core sampling or desiccation tests) on the roofing materials.
-
Advantages: Provides an unassailable scientific report detailing the structural impact thresholds; highly effective for resolving deadlocked disputes or court actions.
-
Disadvantages: Requires a substantial upfront fee that is rarely reimbursable by the insurance carrier.
Mitigating Administrative Risks and Adjuster Disagreements
Managing a property claim involves navigating strict contract rules. Failing to follow standard steps can result in partial payments, policy delays, or total claim denials.
-
Filing a Claim Based on an Expired Storm Date Window: Most insurance policies carry strict filing deadlines, typically requiring you to report a storm loss within one to two years from the actual date of the weather event. If you delay filing until a leak appears three years later, the insurer will deny the claim based on late notification rules. Prevention: Review your local weather histories immediately after a heavy storm, check your roof surface promptly, and open a claim file as soon as damage is verified.
-
Signing Open-Ended Contingency Agreements Too Early: Property owners frequently sign documents with traveling storm restoration crews right after a storm. If these agreements contain hidden fine print locking you into a single contractor before your claim is even approved, your project options become severely limited. Prevention: Never sign a structural contract unless it clearly states it is completely contingent upon your insurance company approving the damage scope for full replacement.
-
Failing to Document the Bare Decking and Code Violations during Reconstruction: If a roofing crew tears off old shingles and covers up rotted wood decking or missing valley flashings without taking clear photos, the insurance company will deny any supplemental payment requests for those hidden materials. Prevention: Require your builder to maintain a continuous, date-stamped photographic log of every layer of the roof during the deconstruction phase.
Long-Term Roof Management and Preventative Care
While a successful claim secures a fresh structural roof layer, maximizing the operational lifespan of the new installation requires a consistent preventative care routine.
-
Bi-Annual Maintenance Checklist:
-
Clean out perimeter gutter channels and downspouts to prevent rainwater backing up beneath the lower starter shingle courses.
-
Inspect the rubber pipe boots and metal counter-flashings around chimneys and ventilation ports for signs of cracking or caulking failures.
-
Trim back overhanging tree limbs to keep branches from scraping away the protective ceramic granules during high winds.
-
-
Post-Storm Evaluation Protocol:
-
Walk the yard after every major storm event to check for fallen shingle pieces or massive granule accumulations at downspout exits, indicating that your roof needs a closer inspection.
-
Claims Verification and Asset Record Organizing
Maintaining an organized archive of your claims documents protects your financial investment and ensures subsequent home sales, property appraisals, or future storm tracking proceed smoothly without conflict.
Systematizing Claims Asset ledgers
Property owners should compile an organized physical or digital file binder containing the official adjusters’ Loss Statement Report, original meteorological radar proofs, fully signed building permits, itemized contractor invoices, and date-stamped proof of deductible payments.
Illustrative Claims Profiles
-
Example A: A homeowner preserves a copy of their contractor’s final invoice and the insurer’s depreciation release form, proving to a future home buyer that the full roof was legally replaced and paid for.
-
Example B: During a home appraisal for a property sale, the owner presents proof of an upgraded Class 4 impact-resistant shingle installation, successfully adding authenticated asset value to the home’s final valuation.
-
Example C: An owner stores a complete set of “before” and “after” photos of their flashings and valley treatments, streamline-tracking a quick approval when a subsequent secondary storm hits the opposite side of the estate years later.
Closing Summary
Successfully navigating a property loss transition using a comprehensive hail damage roof insurance claim checklist framework depends on balancing meticulous physical evidence collection with strict policy deadline compliance. While a major storm event introduces substantial stress and sudden structural exposures, it also offers a strategic window to completely restore your property’s primary defensive line. By verifying exact storm dates, documenting collateral metal impacts, avoiding common contract traps, and keeping detailed record ledgers, property owners can safely secure a full roof restoration that functions flawlessly for decades.
Frequently Asked Questions (FAQ)
What is the exact difference between ACV and RCV in a roof insurance policy?
Actual Cash Value (ACV) pays you the depreciated value of your roof based on its current age and wear at the time of the storm, meaning you must pay out-of-pocket for the lost value. Replacement Cost Value (RCV) covers the full real-world cost to replace your roof with brand-new materials today; the insurer pays the initial depreciated value upfront and releases the remaining holdback funds once you prove the work is fully complete.
Can an insurance company drop my coverage simply because I file a hail damage claim?
In the vast majority of states, insurance companies are legally prohibited from canceling your policy or raising your individual premiums solely because you file a claim for storm damage caused by a natural event (an Act of God). However, if an entire geographic region is hit by widespread, catastrophic storms, the insurer may adjust base rates across the entire zip code during annual policy renewals.
How many hail hits in a specific area do adjusters look for to approve a full roof replacement?
While specific criteria vary slightly between insurance carriers, the standard industry guideline for approving a full roof replacement requires finding a minimum of 8 to 10 distinct, functional hail impacts within a designated 10-by-10-foot square area (known as a structural “test square”) across multiple faces of the roof.