Smart Outdoor Landscape Lighting Installation Guide
Architectural Illumination: The Technical Guide to Smart Outdoor Landscape Lighting Systems
The integration of smart home technology into residential and commercial landscapes has revolutionized how exterior spaces are illuminated, managed, and secured. Traditional outdoor lighting relies on binary timers, manual switches, or passive photocells that react rigidly to changes in daylight. Modern smart landscape lighting systems, however, utilize low-voltage electrical infrastructures combined with wireless communication protocols (such as Wi-Fi, Bluetooth mesh, or Zigbee). This infrastructure allows each fixture to be individually programmed, dimmed, color-tuned, and synchronized with external data feeds, security systems, or astronomical clocks.
Transitioning from conventional hardware to an automated exterior grid requires a solid understanding of electrical distribution, wireless signal physics, and lighting design. This comprehensive guide provides an objective, educational breakdown of the core components, layout considerations, installation methodologies, and troubleshooting steps involved in modern lighting systems. Readers will learn how to design balanced lighting zones, manage voltage drop across long wire runs, protect electronic components from environmental moisture, and systematically plan a scalable, low-voltage smart installation.
Overview of Smart Outdoor Landscape Lighting Installation

When analyzing a smart outdoor landscape lighting installation, property owners must view the project as a combination of two distinct networks: a low-voltage electrical distribution loop and a wireless data mesh. The physical installation transitions standard 120-volt alternating current (AC) household power down to a safe 12-volt or 24-volt direct current (DC) or AC baseline using an exterior-rated transformer. Unlike traditional systems where the transformer controls the power to the entire wire run, smart systems maintain continuous power to the line, shifting the control mechanisms directly into the individual LED drivers or localized zone-control modules.
The primary objective of implementing an automated exterior lighting network is to enhance property security, safety, and visual appeal while optimizing energy consumption. A successful installation provides predictable, automated adjustments that align naturally with seasonal changes, daily weather shifts, and occupant habits. By using individual fixture addressing, property owners can configure specific paths, focal points, and ambient zones without having to install separate, complex parallel wiring loops.
Fixture Classifications and Wireless Network Typologies
Smart landscape systems can be built using several mechanical and wireless communication configurations. The chosen framework dictates the installation depth, wire gauge requirements, and total signal range.
System Infrastructure and Fixture Overviews
| Category / Type | Description | Common Use Case | Time / Cost / Effort Level |
| Smart LED Fixtures (Individual Addressing) | Fixtures containing built-in wireless receivers and color-tuning/dimming microchips. | Intricate landscape designs requiring precise control over single plants or architectural columns. | Medium installation time; High material cost; Moderate physical effort. |
| Smart Transformer Zone Control | A high-capacity transformer with separate multi-tap terminals managed by an integrated smart control module. | Retrofitting existing standard low-voltage wiring loops into automated, independent zones. | Low installation time; Moderate cost; Minimal physical effort. |
| Inline Smart Switching Modules | Weatherproof wireless relays spliced into traditional wire trunks to group standard fixtures together. | Large-scale properties with extensive linear runs where individual fixture cost is a limiting factor. | Medium installation time; Low to Moderate cost; Moderate effort. |
| High-Voltage Smart Systems (120V Line Voltage) | Architectural-grade lighting networks operating on standard household voltage via smart structural conduits. | Commercial public spaces or expansive estates requiring high-lumen output over extreme distances. | High execution time; Maximum cost; Maximum professional effort. |
Selecting the ideal configuration depends on the scale of the property and the structural materials present across the landscape. Individual smart fixtures offer unmatched design flexibility but require a reliable wireless network across the yard. Conversely, a centralized smart transformer system relies on traditional copper wiring to manage groups of standard fixtures, making it a robust option for landscapes with dense stone walls or heavy soil that blocks wireless signals.
Practical Spatial Scenarios and Illumination Applications
To understand how these automated engineering systems function under real-world design criteria, consider three common physical applications.
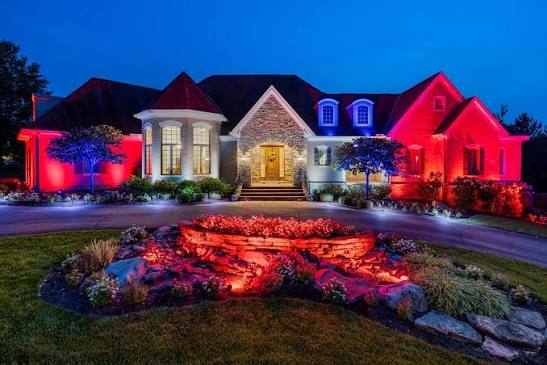
Scenario 1: The Architectural Facade and Pathway Array
A classic residential installation designed to highlight structural pillars, maximize pathway visibility, and improve front-yard security.
-
Key Components: Surface-mounted accent uplights directed at architectural columns, low-profile path lights along walking routes, an exterior smart transformer, and motion-sensor integration near entry points.
-
Relevance: This layout provides clean, glare-free directional lighting that improves security by eliminating dark spots along primary walkways and blind zones near windows.
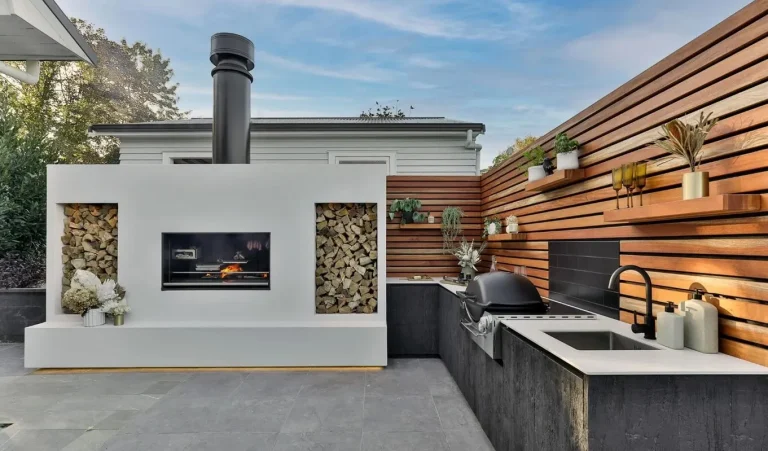
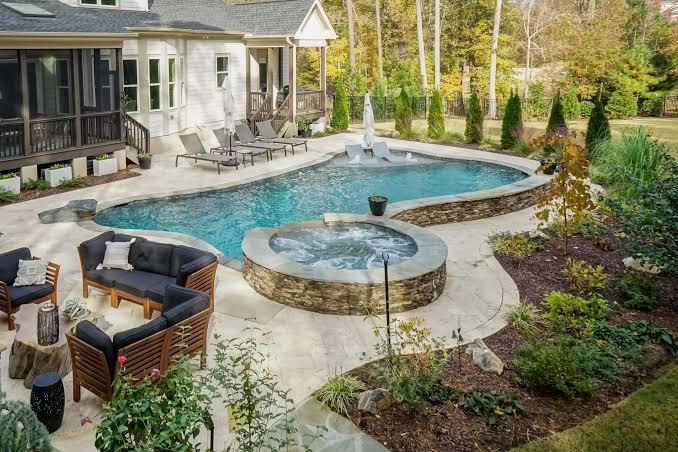
Scenario 2: The Multi-Zone Backyard Entertainment Landscape
An expansive design tailored for properties with distinct outdoor living zones, including patios, retaining walls, mature trees, and water features.
-
Key Components: Well-lights recessed at the base of mature specimen trees, hardscape LED under-cap strip lights embedded in stone benches, color-changing (RGBW) accent spot fixtures, and custom programming tied to home automation scenes.
-
Relevance: This application demonstrates how a single wiring loop can support multiple distinct environments, shifting the lighting design instantly from bright task illumination for cooking to soft, muted ambient hues for evening social gatherings.
Scenario 3: The Expansive Acreage Perimeter Grid
An installation optimized for large properties with long driveways and distant fence lines where standard wireless coverage fails.
-
Key Components: 24-volt heavy-duty direct-burial cables, high-lumen smart path and wash fixtures operating on a wireless mesh network protocol (where every fixture amplifies the data signal to the next), and automated astronomical programming.
-
Relevance: This system represents the limits of long-distance low-voltage engineering, showing how a mesh network architecture can bypass the range limitations of a single central transmitter.
Comparative Evaluation
Scenario 1 relies on clean, functional layouts and basic motion integration to deliver essential safety and curb appeal. Scenario 2 scales design complexity by introducing color manipulation and intricate hardscape lighting integration, which demands advanced zoning layouts. Scenario 3 moves entirely into long-distance electrical engineering and wireless signal daisy-chaining to maintain reliable data connections across wide distances.
Technical Planning, Voltage Calculations, and Resource Frameworks

A reliable smart outdoor landscape lighting installation requires careful planning before purchasing fixtures. Because low-voltage systems run on 12V or 24V lines, they are highly sensitive to voltage drop—the gradual loss of electrical voltage along a wire run caused by copper resistance. If the layout is poorly designed, fixtures at the end of a long cable run will dim, flicker, or fail to communicate with the smart controller.
Sample Project Budget and Engineering Framework
| Category | Estimated Amount / Effort | Explanation | Optimization Tips |
| System Design & Signal Testing | $200 – $800 | Drawing wiring schematics, mapping landscape lighting zones, and verifying wireless signal strength outdoors. | Use temporary battery-powered Wi-Fi extenders during testing to find outdoor wireless dead zones before digging. |
| Smart Transformer & Controllers | $400 – $1,200 | Purchasing multi-tap magnetic or digital transformers with integrated automated switching arrays. | Select a transformer with 20% to 30% extra capacity to accommodate future landscape additions. |
| Low-Voltage Cable & Conduits | $300 – $900 | Sourcing heavy-gauge direct-burial copper wire (12/2 or 10/2 AWG) and protective PVC conduits for high-traffic zones. | Use a thicker 10-gauge wire for lines longer than 100 feet to minimize voltage drop issues. |
| Smart LED Fixtures & Hubs | $1,500 – $6,500 | Purchasing specialized smart path lights, directional up-lights, hardscape fixtures, and wireless gateways. | Standardizing on a single brand’s communication protocol ensures seamless color synchronization and updates. |
| Excavation & Trenching Labor | $600 – $2,000 | Digging 6-to-8-inch trenches through soil, tunneling under walkways, and backfilling. | Lay main cable lines alongside existing lawn irrigation trenches to reduce manual digging hours. |
| System Programming & Commissioning | $300 – $1,000 | Setting up the control app, assigning device IPs, configuring astronomical schedules, and balancing loads. | Group fixtures into logical zones (e.g., “Perimeter,” “Paths”) during the initial app setup to simplify scheduling. |
Note: The financial parameters and resource metrics outlined above serve as illustrative structural examples based on standard national material and labor averages. Final field quotes will fluctuate based on local labor rates, site accessibility, soil composition (such as heavy clay or rock), and the specific level of hardware chosen.
System Architectures and Control Sourcing Options
Executing an automated lighting installation requires choosing a communication framework that matches the property’s size and structural environment.
1. Centralized Wi-Fi Smart Transformers
This approach utilizes standard, non-smart low-voltage fixtures connected to a transformer that features an integrated smart timer and Wi-Fi control card.
-
Advantages: Exceptionally reliable; requires no wireless signal out in the yard; highly cost-effective because it uses standard, proven LED fixtures.
-
Disadvantages: Fixtures cannot be controlled individually; the entire wire run must dim or turn on as a single collective zone.
2. Individual Wireless Mesh Fixtures (Zigbee / Bluetooth Mesh)
Every lighting fixture contains its own smart control module and wireless transceiver. The fixtures communicate with each other, passing data commands down the line from the main smart bridge.
-
Advantages: Complete individual control over every light; allows for precise dimming, color changes, and zoning variations per fixture.
-
Disadvantages: If a single fixture in the middle of a long chain suffers severe physical or signal damage, the mesh link to distant fixtures further down the line can break.
3. Smart Inline Relay Modules
Standard wiring trunks are split into separate sub-lines using small, hidden weatherproof wireless relay switches buried in structural junction boxes.
-
Advantages: Combines individual zone automation with affordable standard fixtures; allows for modular zoning updates without running extra cables back to the transformer.
-
Disadvantages: Requires installing multiple inline waterproof junction boxes across the property, which can complicate troubleshooting if a failure occurs.
Mitigating Electrical Risks and Wireless Signal Failures
Outdoor automation systems must withstand harsh environmental conditions, structural shifting, and wireless signal interference.
-
Improper Voltage Drop Calculations: Connecting too many high-lumen LED fixtures to a long, thin wire run causes the voltage to drop below the minimum required threshold (typically 10.5V for a 12V system). This causes the smart chips inside the lights to reset constantly, resulting in flickering or a total loss of smart connectivity. Prevention: Limit total fixture wattage on a single wire run to 80% of the transformer’s circuit rating, use thick 12 AWG or 10 AWG copper cables, and keep run lengths under 100-150 feet.
-
Water Intrusion at Wire Connections: Standard wire nuts or electrical tape will fail when buried in damp soil. Moisture will seep into the copper splice, causing short circuits, rapid wire corrosion, and system faults that trip the transformer’s circuit breaker. Prevention: Use only pre-filled, silicone-insulated waterproof wire connectors or heat-shrink tubing designed for direct-burial applications.
-
Wireless Signal Blockage from Landscape Elements: Placing smart fixtures behind dense stone retaining walls, metal structures, or thick wet foliage can completely block Wi-Fi or Bluetooth signals from reaching the lights. Prevention: Map out the location of your wireless gateways carefully, use specialized outdoor access points, or choose a mesh-network architecture where the fixtures pass the signal along to each other around obstacles.
Long-Term Maintenance and Asset Management Protocols
While low-voltage smart LED networks avoid the high energy costs and frequent bulb burnouts of old halogen systems, maintaining peak performance requires a consistent preventative care routine.
-
Bi-Annual Maintenance Checklist:
-
Clean dirt, mulch, and fallen leaves off the glass lenses of up-lights and well-lights to prevent heat buildup and ensure clean light output.
-
Check the alignment of path lights that may have been bumped or tilted by lawn mowers or foot traffic.
-
Inspect the exterior transformer enclosure for signs of insect nesting or moisture ingress, and verify all terminal screws are tightly securing the copper cables.
-
-
Firmware and Software Management:
-
Update the system’s smart bridge firmware and mobile application bi-annually to patch wireless security vulnerabilities, improve network stability, and unlock updated automation scheduling features.
-
Performance Verification and Wiring Documentation
Maintaining an organized archive of your installation plans protects your financial investment and ensures subsequent property sales, utility work, or landscape changes proceed smoothly without conflict.
Systematizing Installation Records
Property owners should keep an organized file or binder containing structural design layouts, localized home automation integration keys, transformer voltage loading logs, and accurate underground wire path maps.
Illustrative Tracking Profiles
-
Example A: A homeowner files an updated yard map showing the exact underground paths of their direct-burial cables. This prevents utility workers from accidentally cutting through the lighting lines during future gas line or fiber-optic installations.
-
Example B: A contractor documents a system’s baseline voltage readings, recording that the furthest fixture on Run A receives exactly 11.4V. This provides a clear benchmark that helps technicians quickly troubleshoot future wire degradation issues.
-
Example C: A property owner stores the specific wireless MAC addresses and zoning names for every smart fixture in an asset ledger. If a lawn mower destroys a path light years later, they can easily replace the hardware and reconfigure the exact same smart automation zone without hassle.
Closing Summary
Successfully executing a smart outdoor landscape lighting installation depends on balancing low-voltage electrical engineering with stable wireless network design. Transitioning away from old mechanical timers to individually controlled wireless grids allows property owners to improve home security, eliminate energy waste, and create dynamic outdoor living zones. By calculating voltage drop carefully, using high-quality waterproof wire connectors, and choosing a wireless framework that matches the property’s layout, homeowners can secure a beautiful, sustainable outdoor lighting system that functions reliably across every season.
Frequently Asked Questions (FAQ)
What wire gauge should be used for a smart landscape lighting system?
For standard low-voltage landscape lighting runs up to 100 feet, 12-gauge direct-burial wire (12/2 AWG) is the industry standard. If your wire runs exceed 100 to 150 feet or carry a high total wattage load, you should upgrade to a thicker 10-gauge wire (10/2 AWG) to minimize voltage drop and protect smart components from communication failures.
How deep do low-voltage landscape lighting wires need to be buried?
According to the National Electrical Code (NEC) for residential low-voltage lighting (circuits operating under 30 volts), direct-burial cables must be buried to a minimum depth of 6 inches. If the wire runs through a high-traffic area, under a driveway, or across a garden bed prone to regular tilling, it should be housed inside protective PVC conduit for extra safety.
Can I mix standard LED fixtures with smart fixtures on the same transformer?
Yes, you can power both standard and smart LED fixtures using the same low-voltage transformer, provided the total wattage does not exceed the unit’s capacity. However, the standard fixtures will remain continuously powered unless you install an inline smart relay module to control that specific wire trunk separately from your individually addressed smart lights.